Hello, Know Direction readers, and welcome to Alex Analyzes! Normally I’d write an article like this under the banner of Guidance or maybe Dev Pit, but I got inspired by my fellow Know Direction writer Randel Meyer, who uses “Randal Reads” for his big chonky book reviews, and I figured that since I have a name that can alliterate just as well as Randal Reads, it’s a good time to come up with a new branding! So them’s the beans: in Alex Analyzes, I’ll be reviewing *something* neat for your viewing pleasure. Tabletop RPG products, accessories, or sometimes simple, neat things that people in our industry are doing.
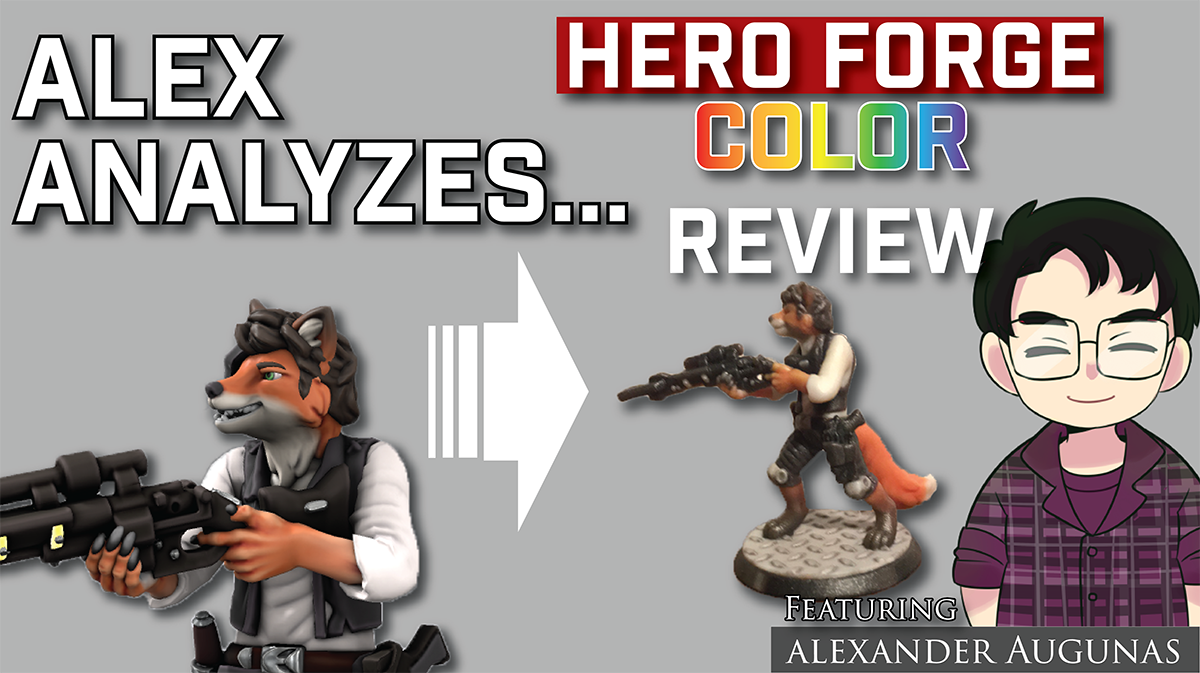
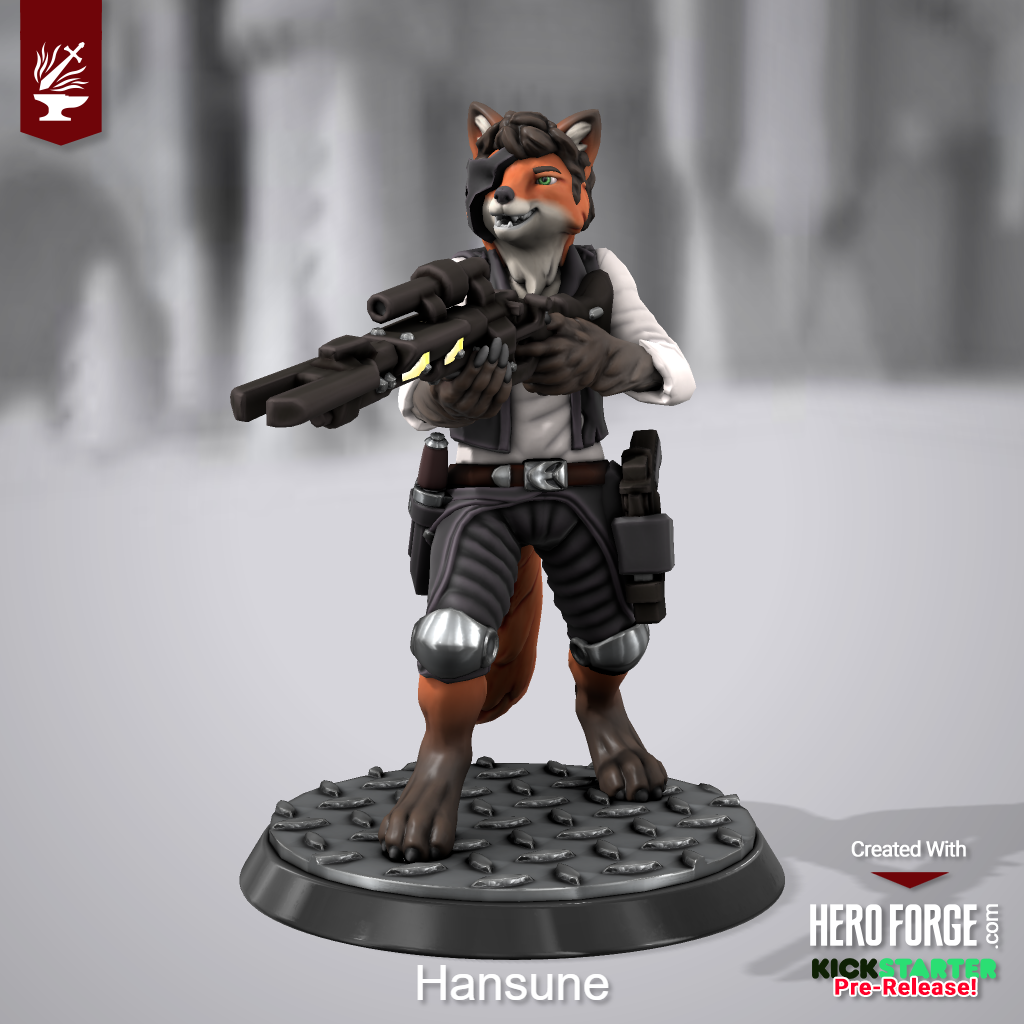
Today, Alex is Analyzing HeroForge Color!
What Is HeroForge Color?
HeroForge is an online 3D miniature customization and printing tool. HeroForge uses state-of-the-art 3D moldeling technology to allow you to assemble your perfect miniature from hundreds of different appearances and styles and then ship those designs off to a 3D printer (currently Shapeways at the time of writing) to be printed in your choice of material and shipped to you for your games. The default miniature size is perfect for the 1-inch squares so commonly used in ttRPG games, and you can scale them up to be larger if you want.
If you’ve never heard of HeroForge before, you can try it out here at this link.
HeroForge Color, by extension, is the code name given to the 2.0 version of the HeroForge tools, which are designed with color 3D printing capabilities. HeroForge Color is designed to allow you to color the characters you design using a myriad of options and coloring styles that are specifically designed to replicate the techniques of master painters. HeroForge Color is currently in Beta, and was funded via Kickstarter. You can learn more about HeroForge Color at their Kickstarter Page at this link.
I was a Kickstarter backer, so not only do I have access to the Beta Tools, but I designed and printed a 3D HeroForge Color model. So today, I’m going to go over the steps quickly before sharing my thoughts.
Designing a HeroForge Color Miniature
-
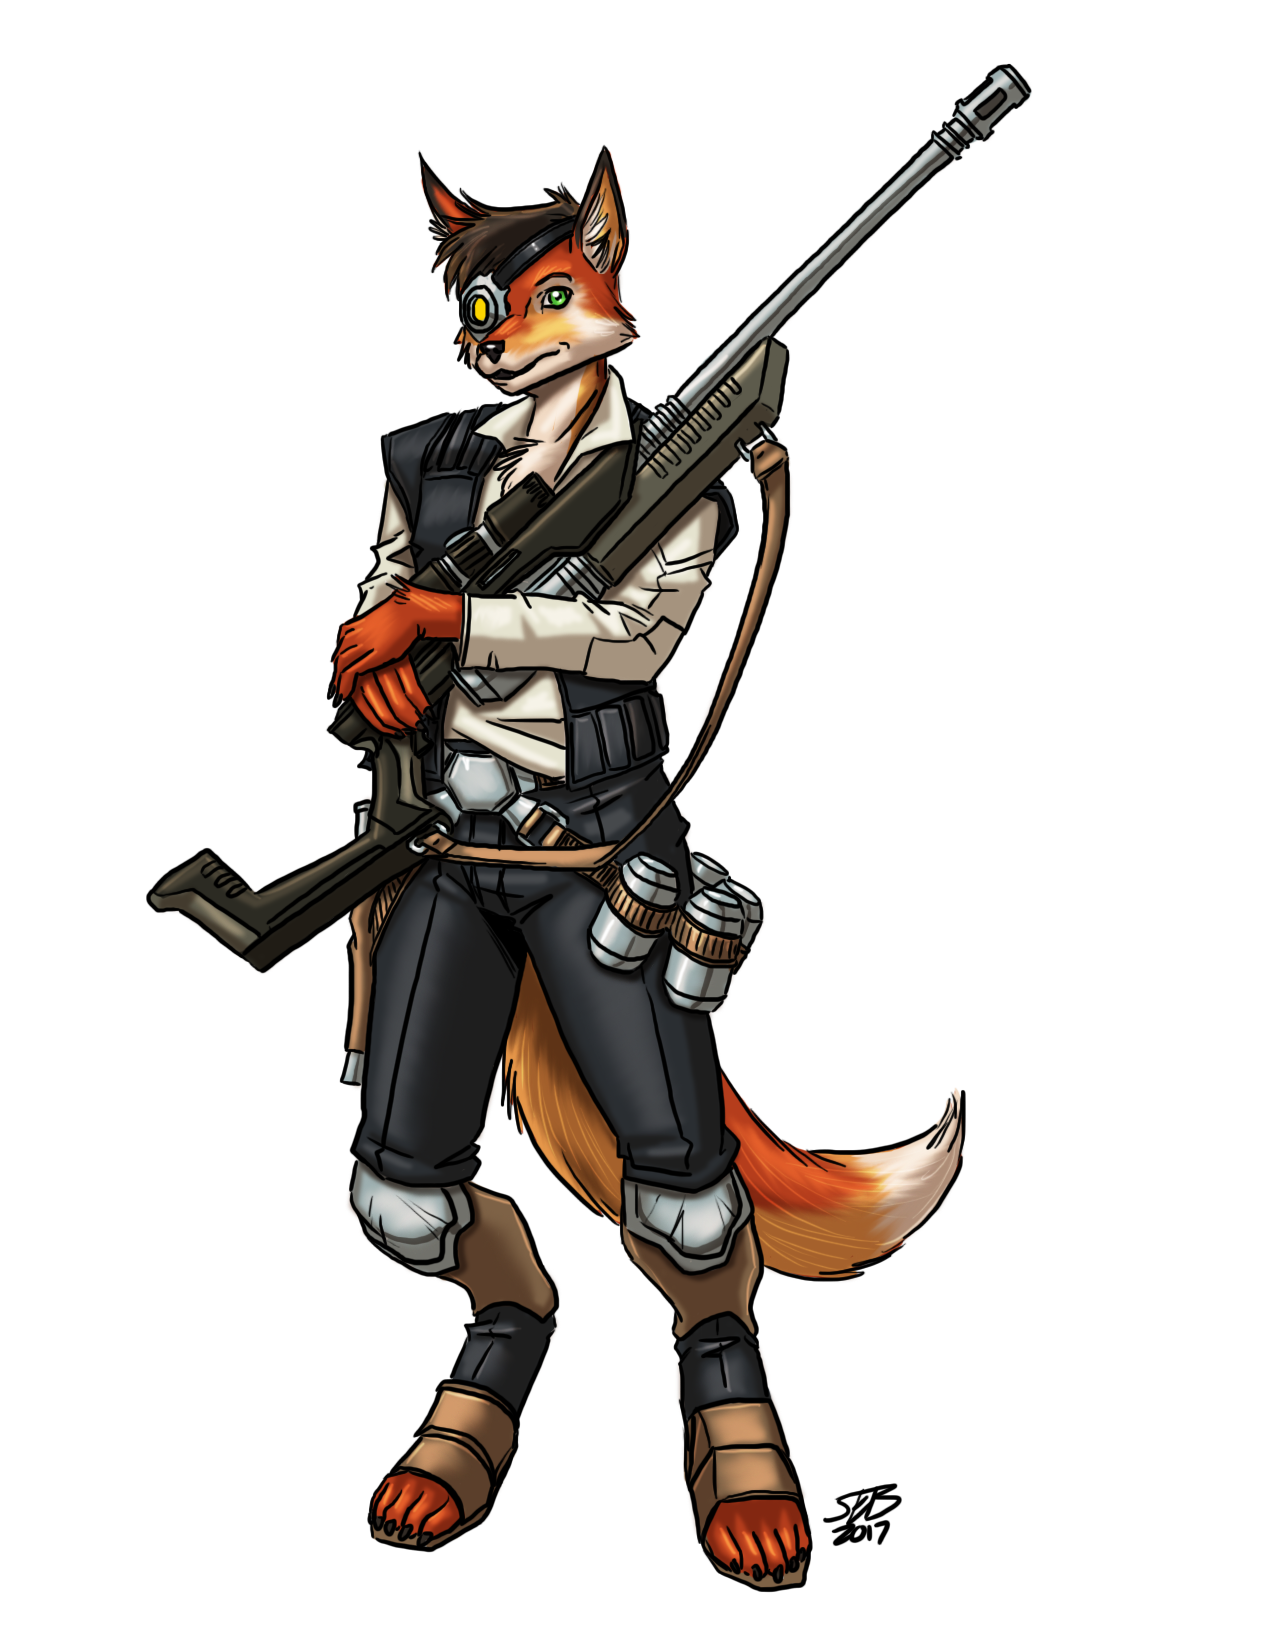
- Hansune’s concept art for comparison.
-
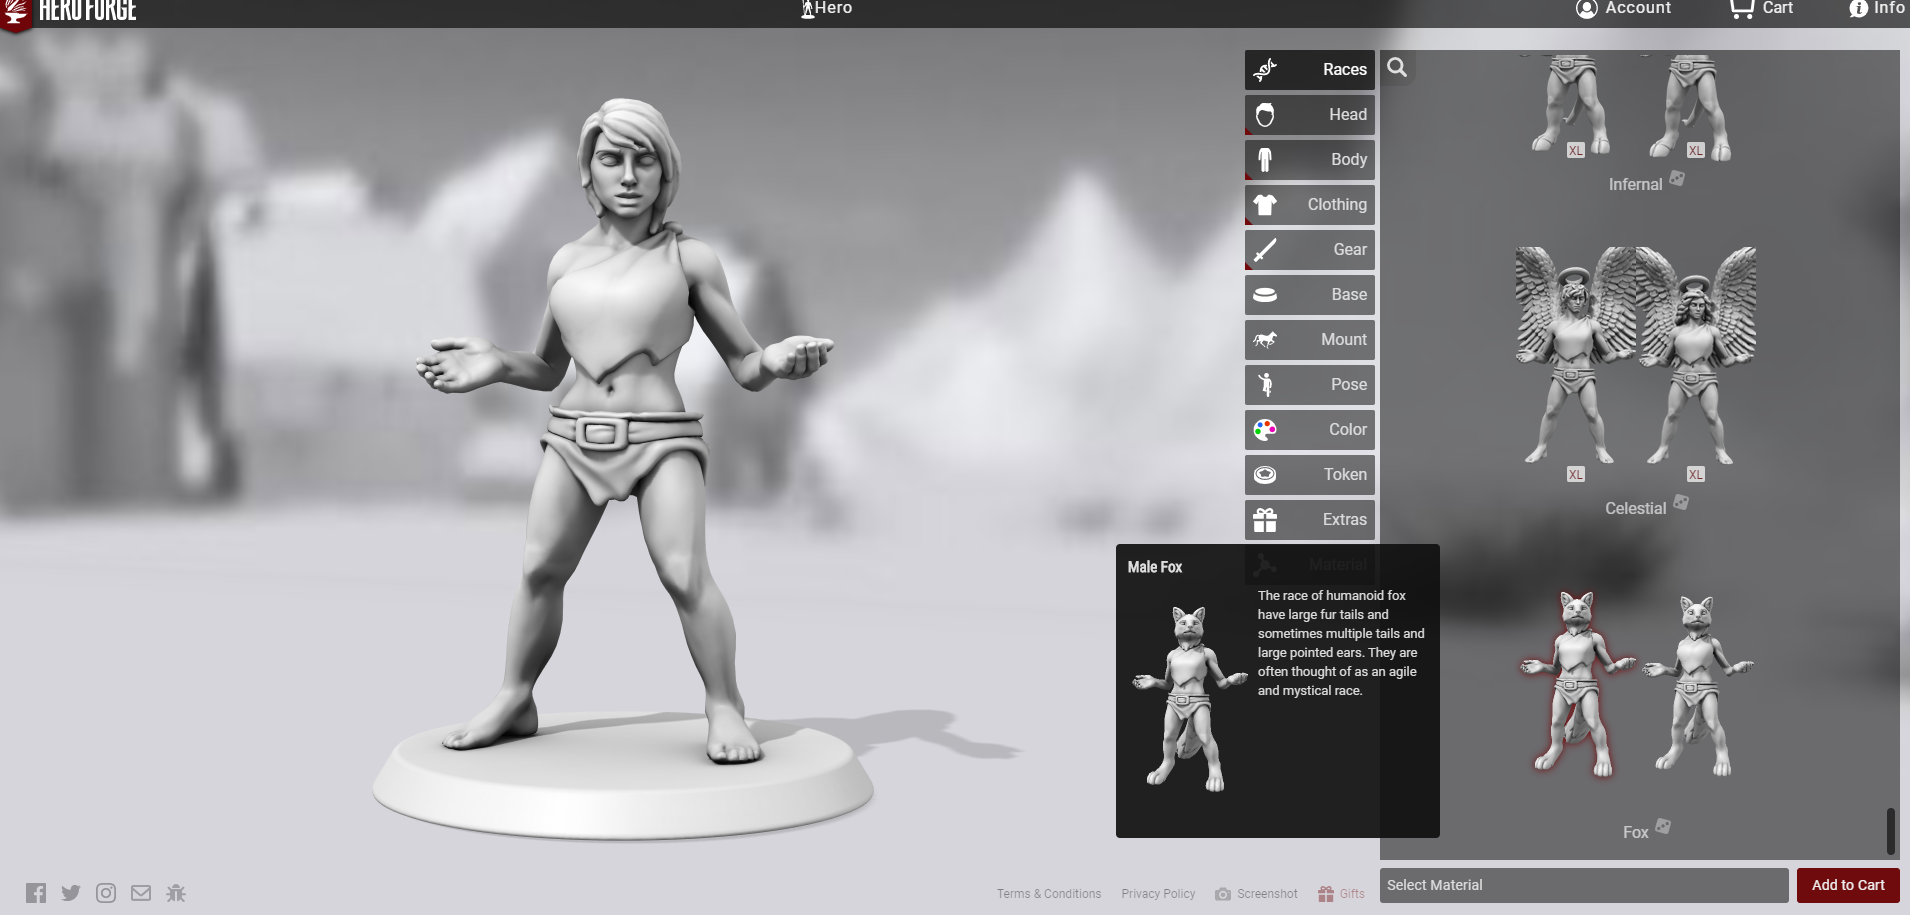
- Step 1 is to pick the ancestry that best suits your character! This is the default customization selection, and there’s a TON of options to choose from! These races are actually just preselected options found throughout the Head and Body sections, though, so you can pick a starter template and customize it to whatever you want using the provided tools. I picked Male Fox to start with, since that best fits Hansune.
-

- Step 2 is to customize Hansune’s head. I like the fox head they gave me by default, but used the softness tool to adjust how his facial fur falls. Instead of being vertical, its horizontal now.
-
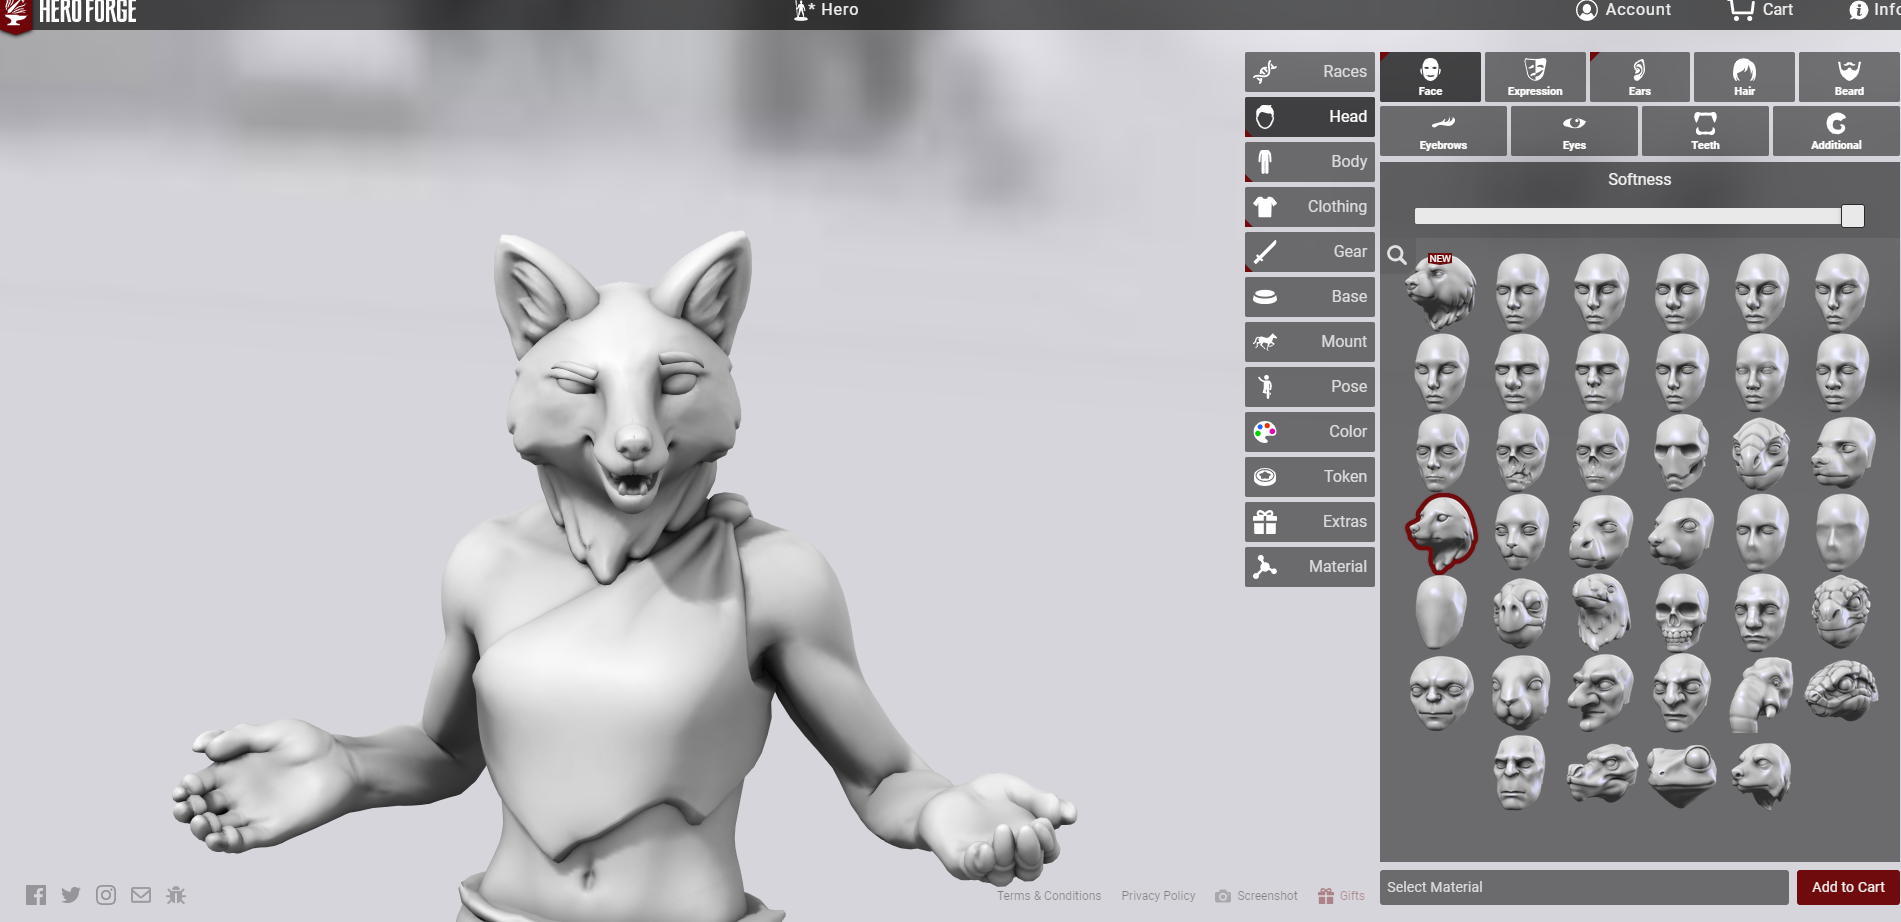
- After we customize softness, we can customize the face’s expression. Each slider represents a specific emotion / combination of facial positions, and you can mix and match them however you want. I wanted “bemused smarmy” for Hansune.
-
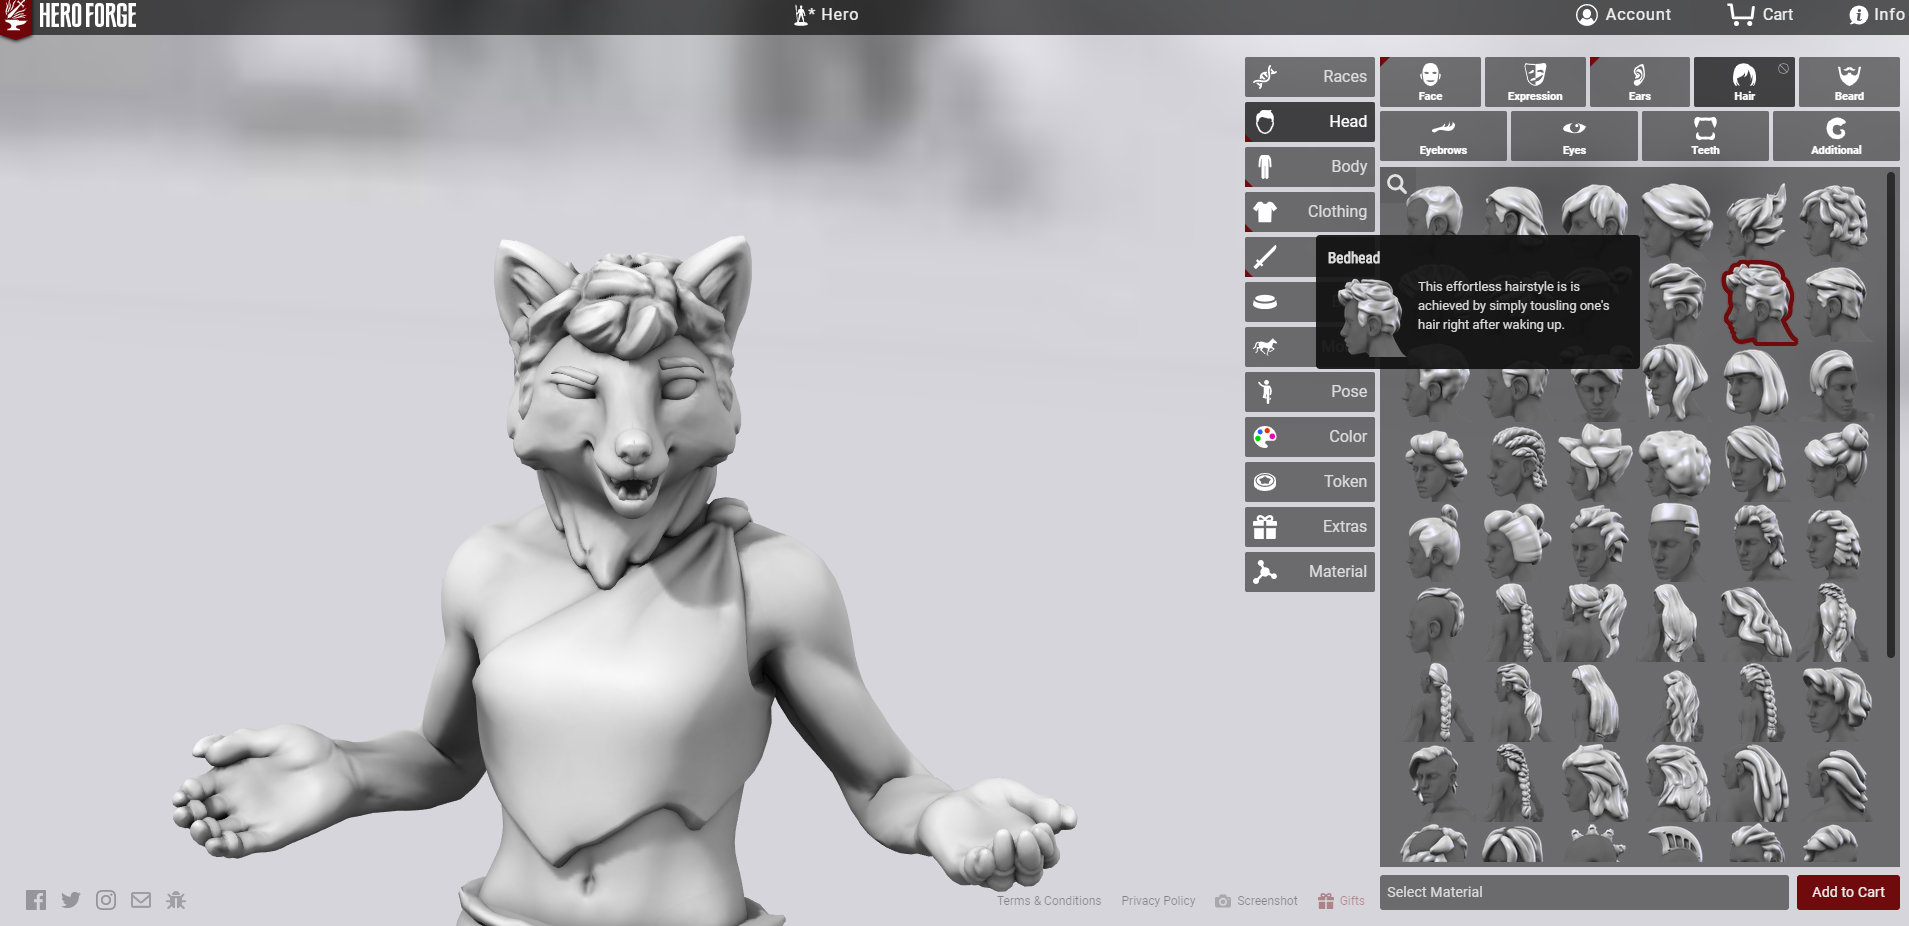
- Step 3 is to pick your character’s hair style! Hansune definitely has a bit of human-ish hair on his head, so I picked the one that I thought was closest—bedhead.
-
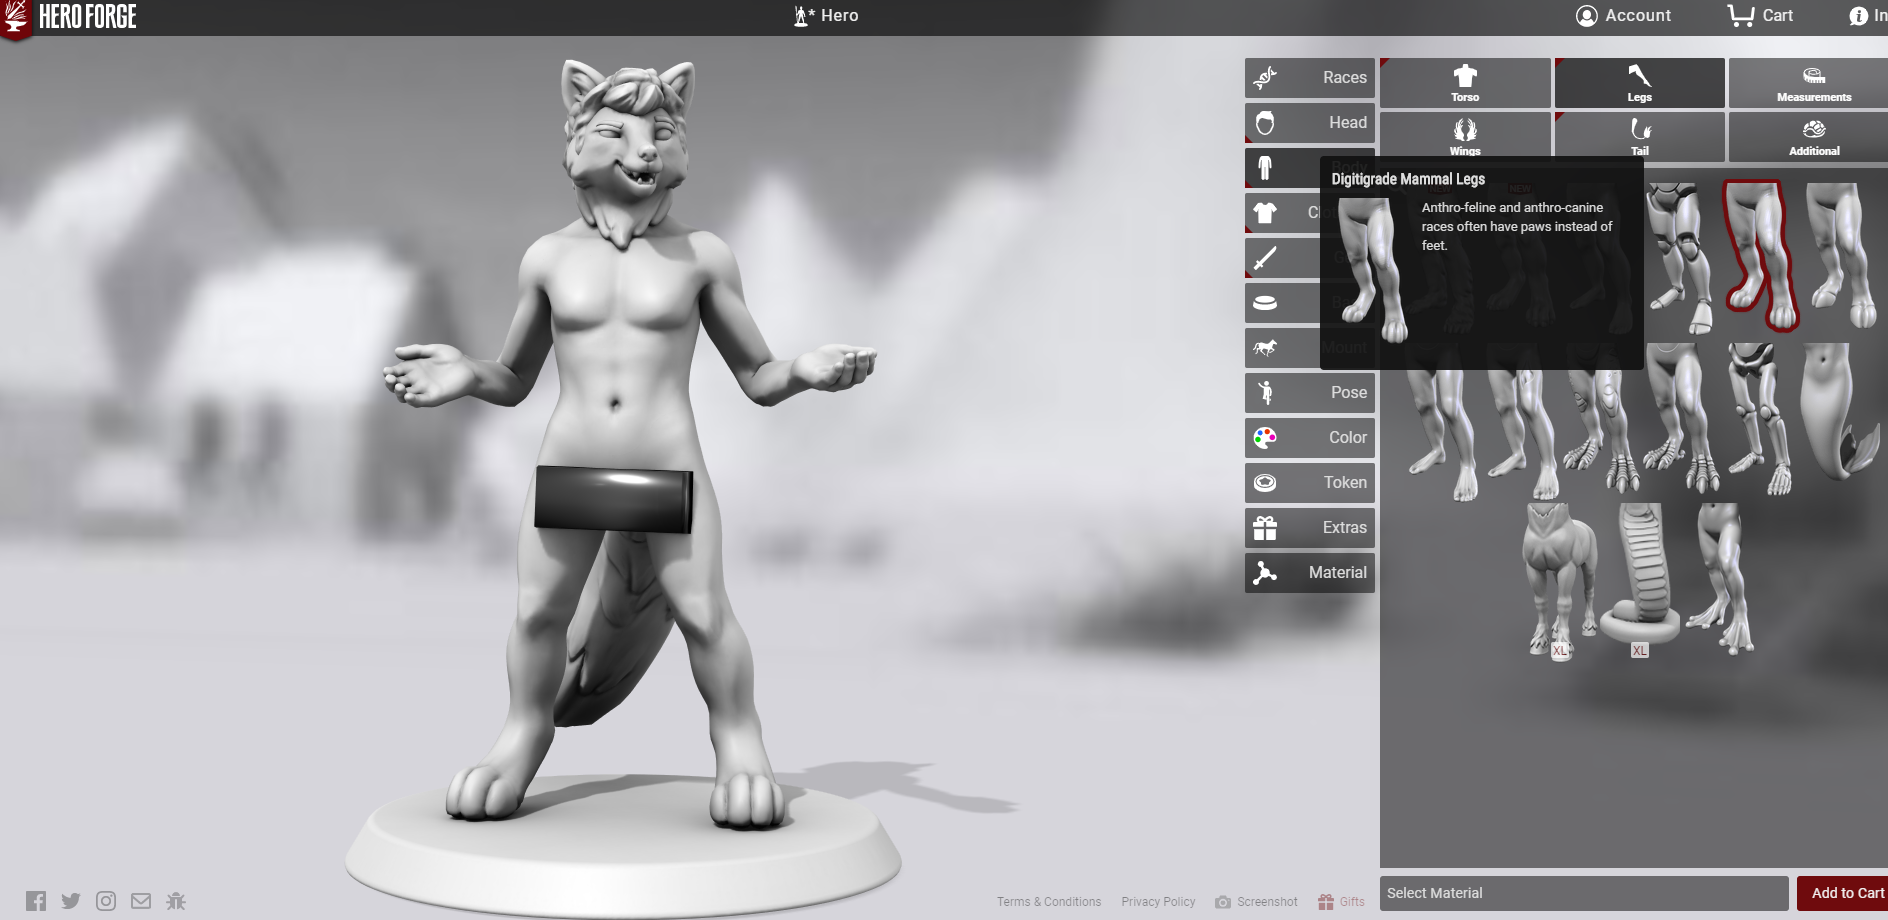
- Now for Step 4, we get to customize our body choices! This is the default “body” for the fox ancestry, but since I printed Hansune a new option’s become available that I honestly think looks a lot better. I’ve pulled off Hansune’s clothes so you can compare this default mammal body with the new “furry” mammal body, but don’t worry. The Know Direction Network is an all-ages website, and we would never allow anything obscene in our content!
-
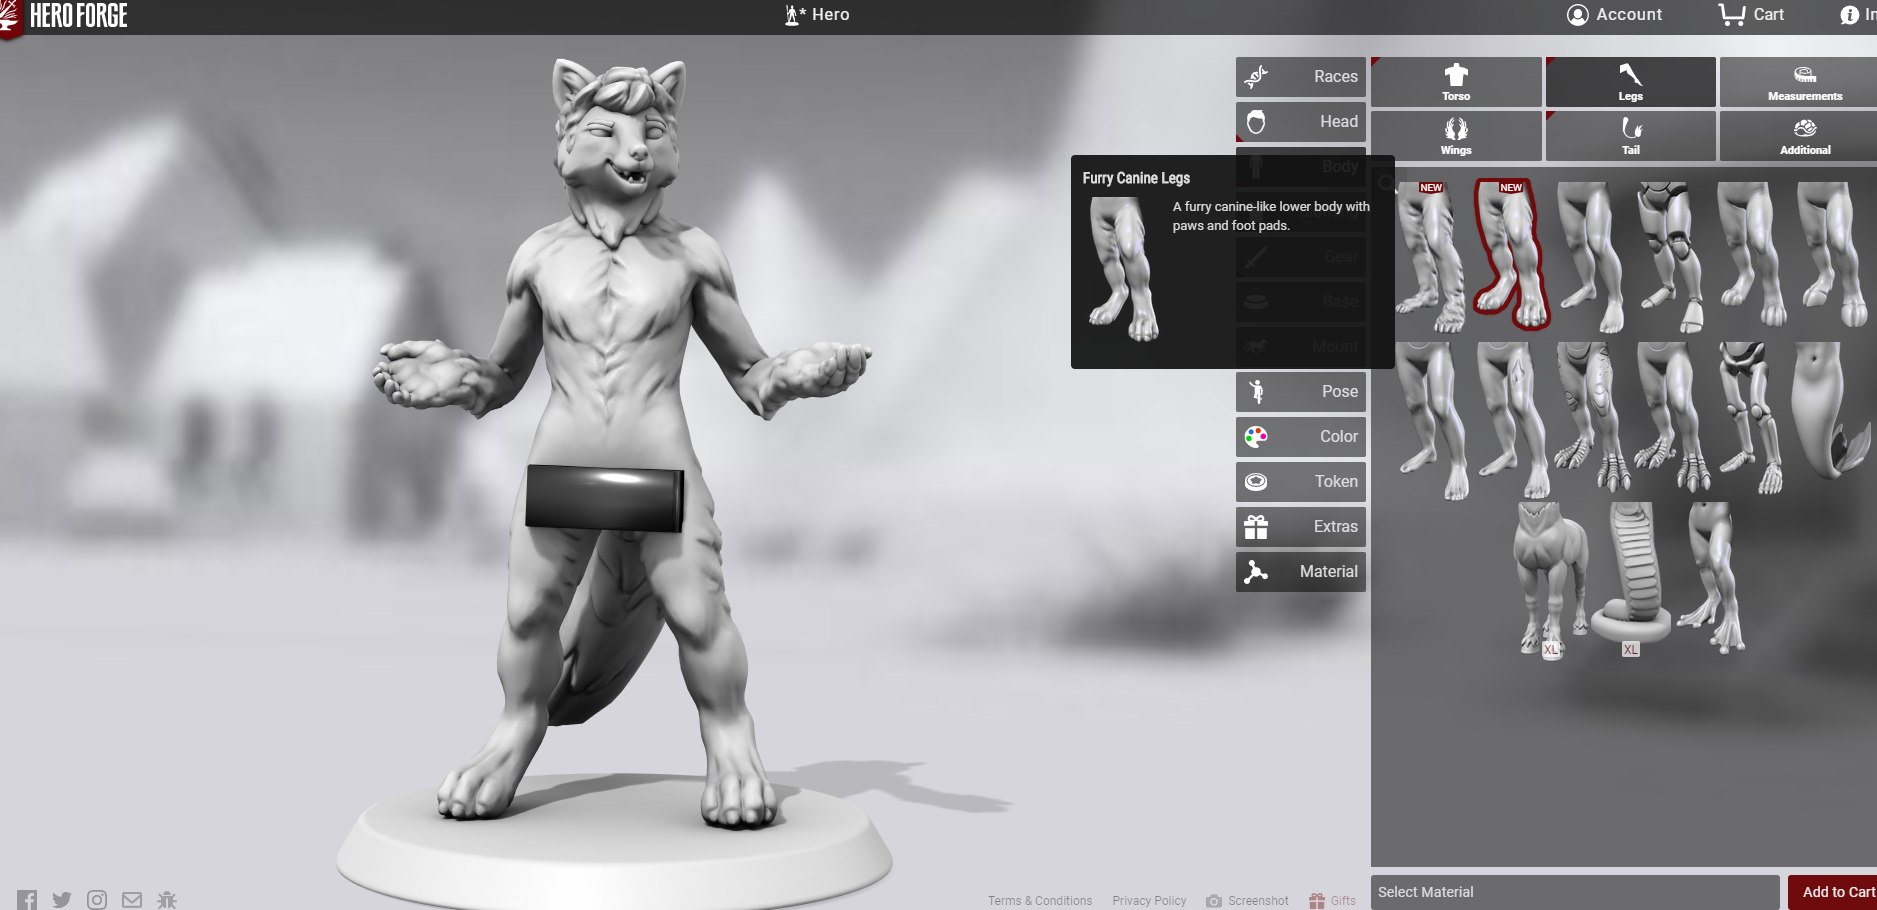
- Here’s the same model, but with the new “furry” body type. Personally, I think this one looks a LOT better than the original mammal one for foxes; the fur texture is awesome, and the feet look more like fox feet than kitten paws. If I had this option available when I actually printed the miniature, I would have used it. So for this demonstration I’m gonna use this one. Hope that’s okay!
-
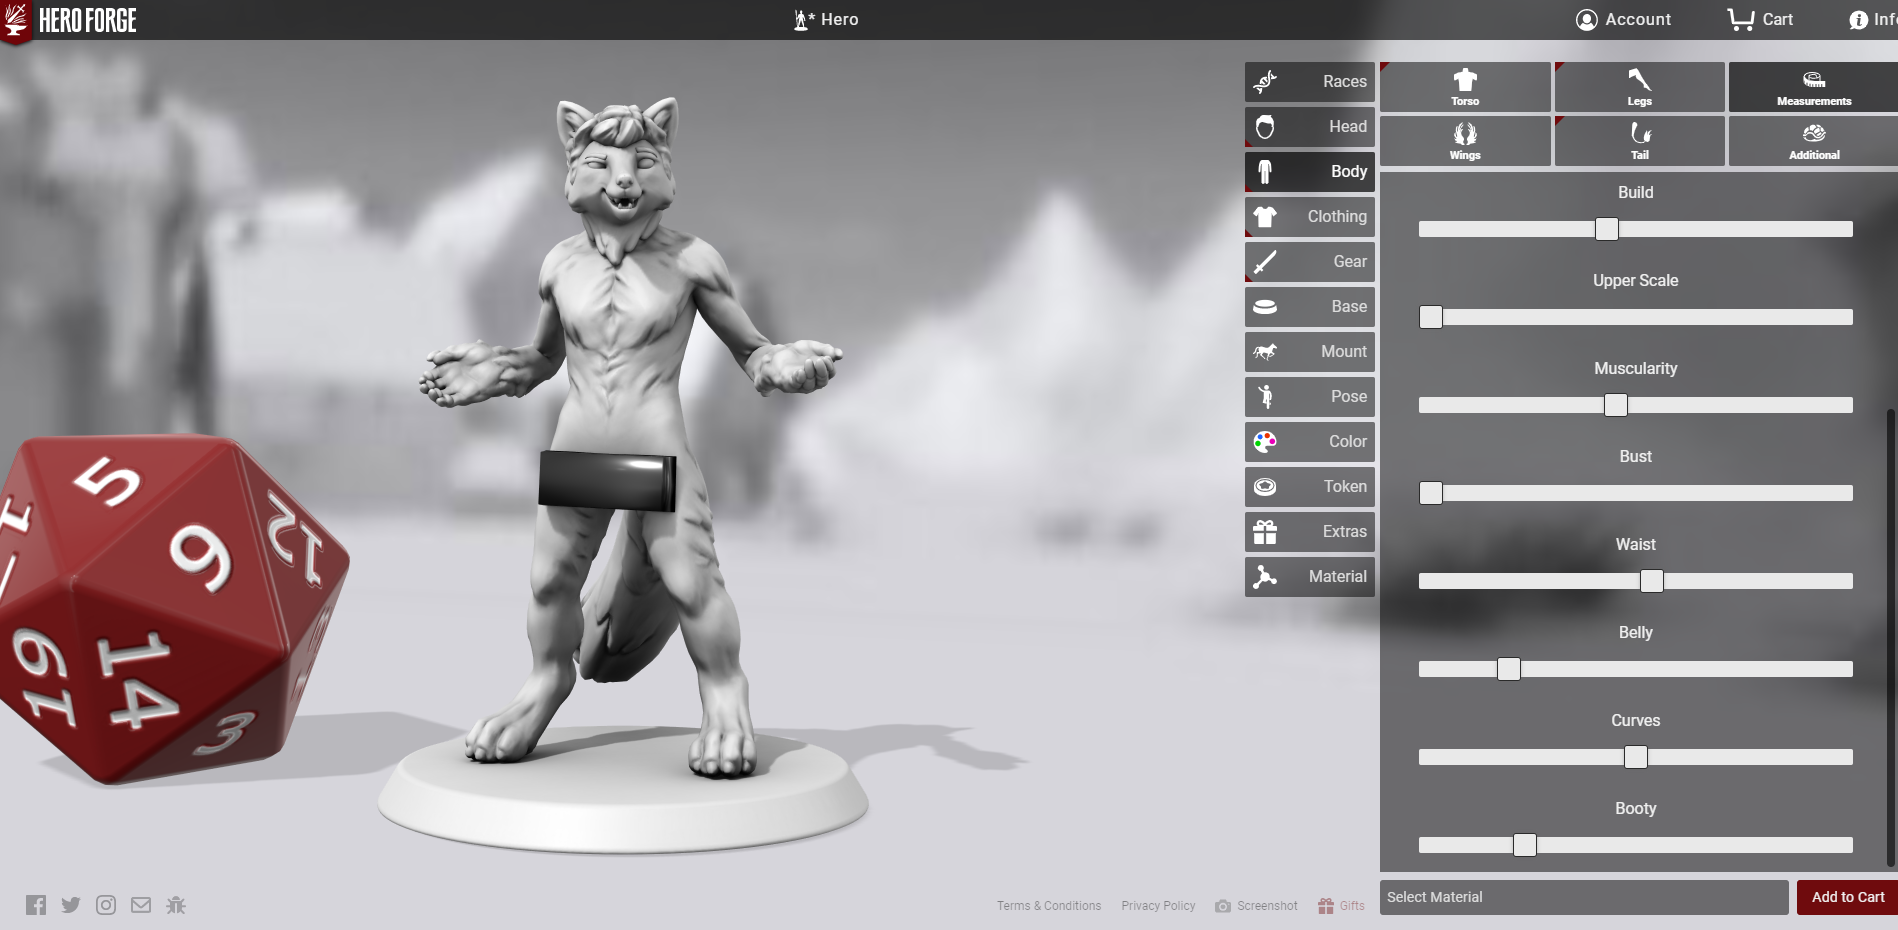
- Step 5 is to adjust the body’s proportions. You can REALLY do a lot here, choosing things like how wide your shoulders are, how much muscle mass you have, and so on. Hansune’s a lean guy, so I picked options that would make him look less bulky.
-
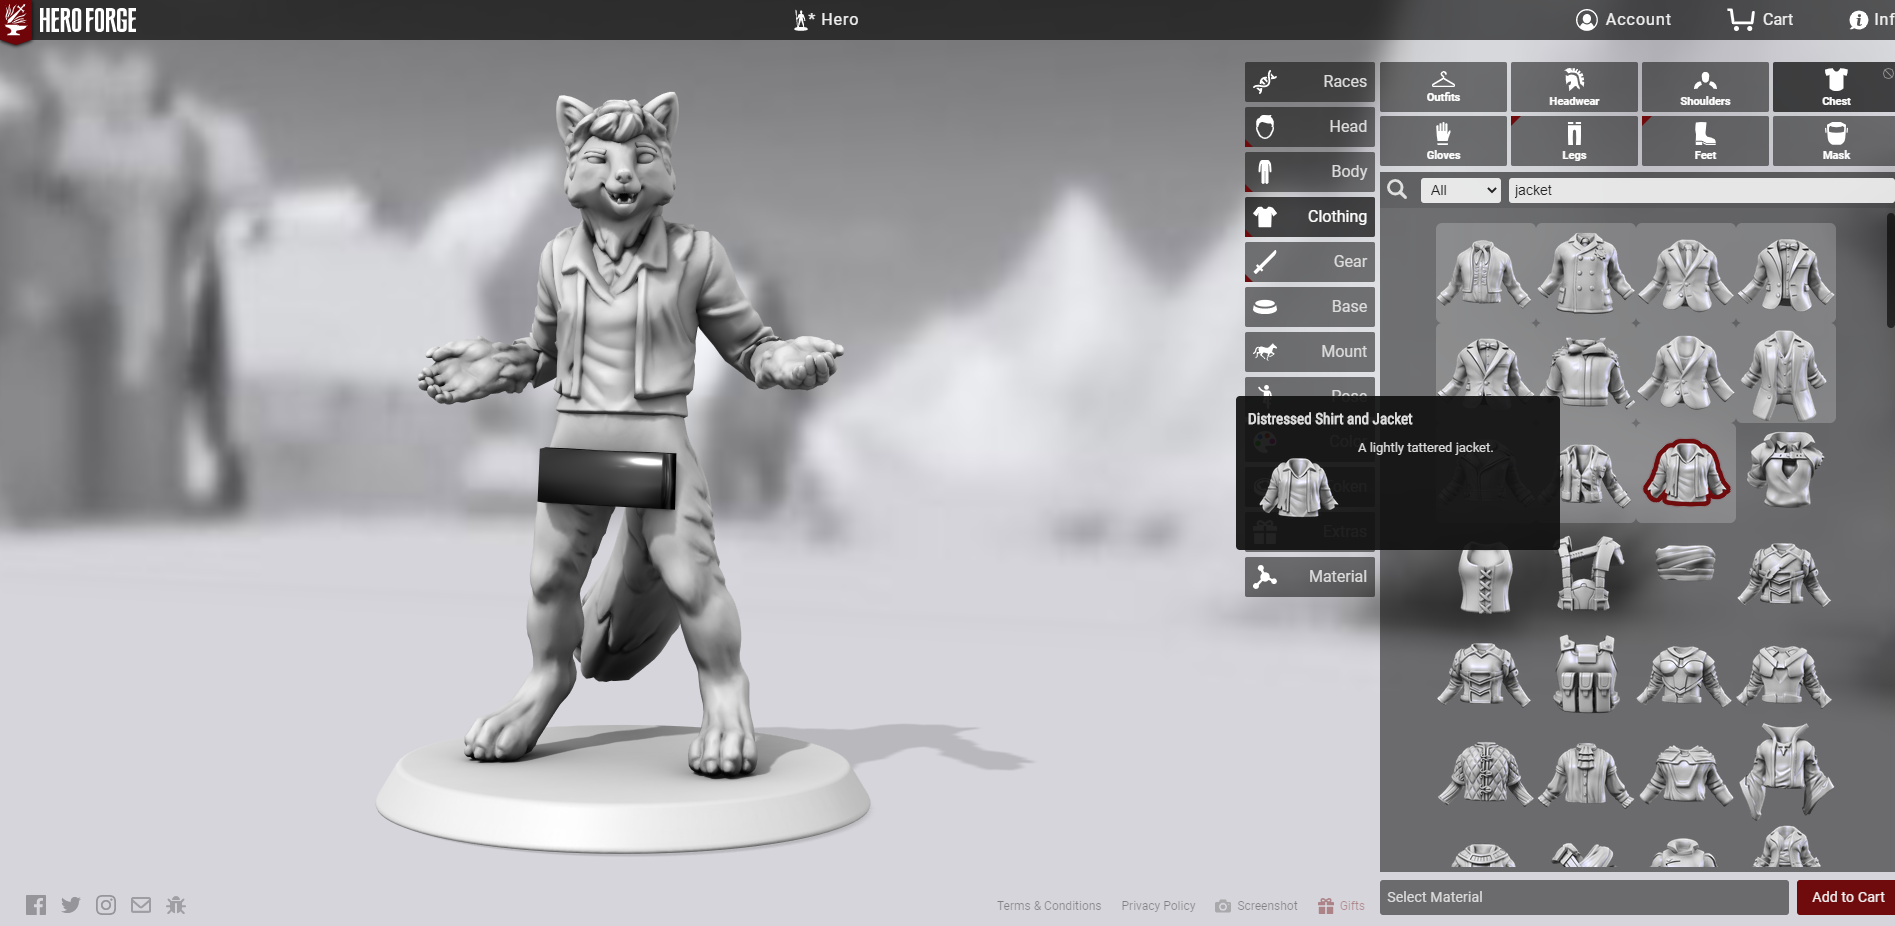
- Step 6 is where the fun starts—clothes! You get to fully design your character’s outfit from a number of different options. For Hansune, the jacket that I felt best captured what he’s wearing in the reference image is this tattered jacket.
-
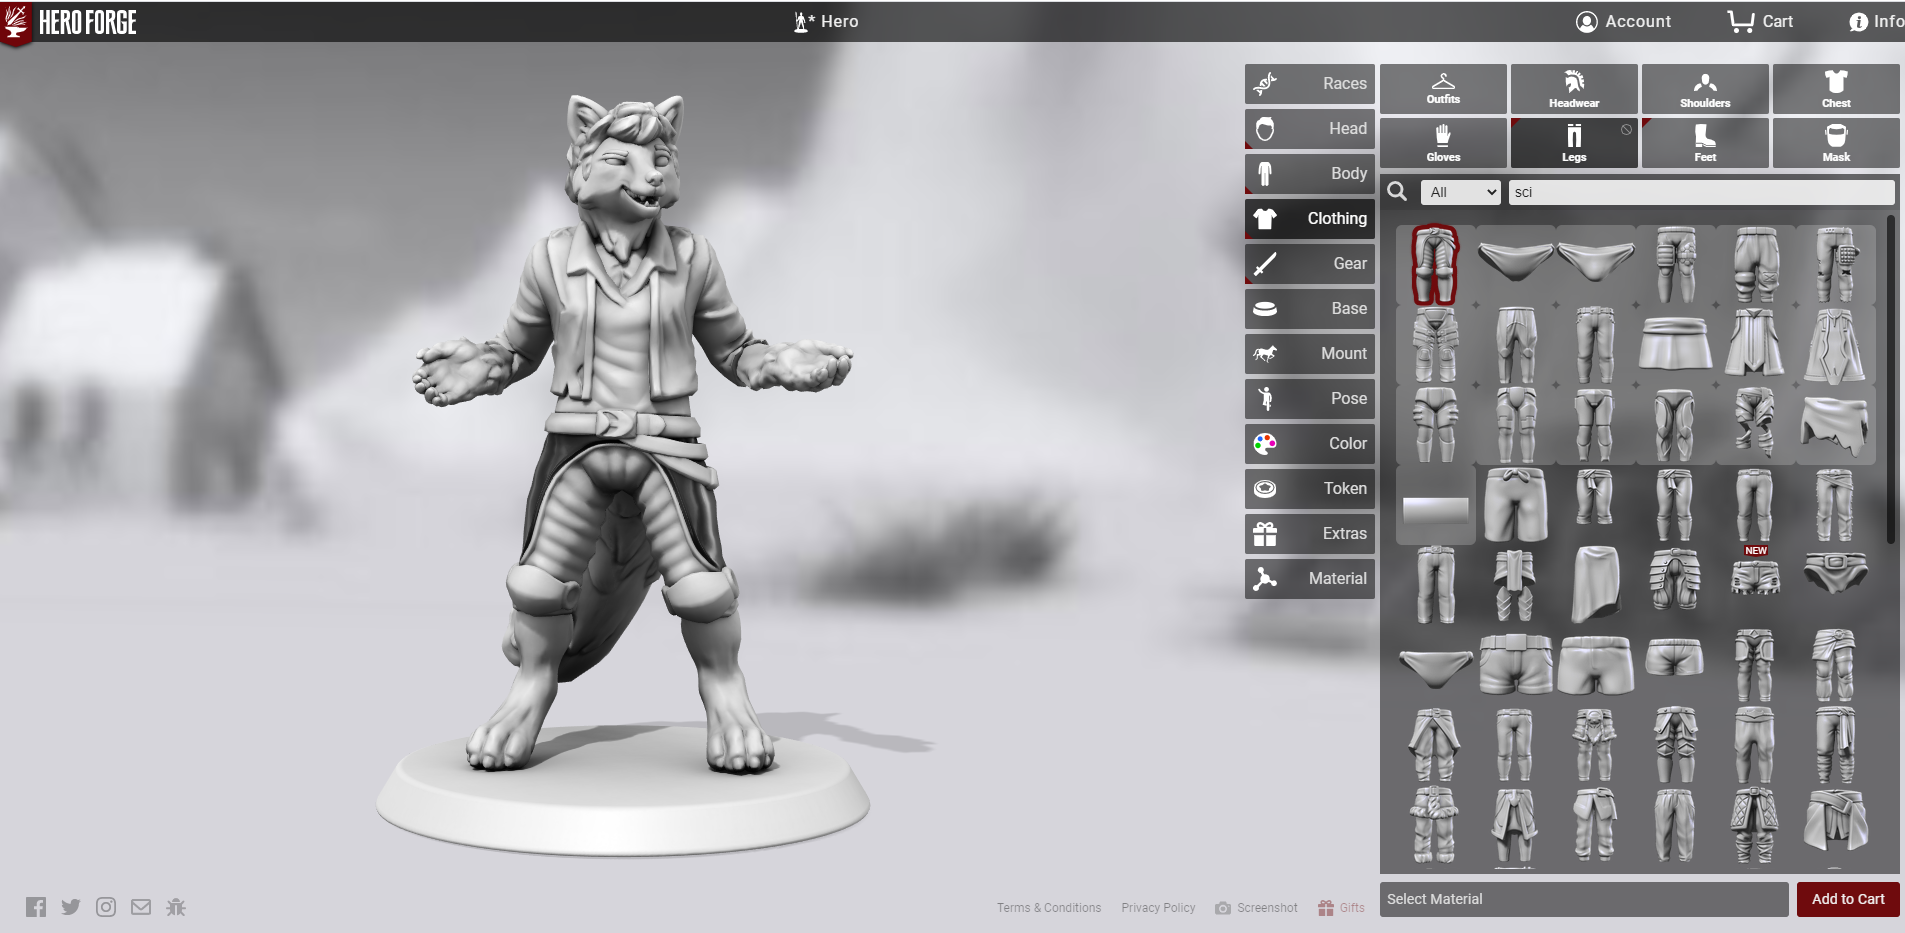
- Finally! PANTS! Hansune is decent once more. And honestly, this pair of Sci-Fi Agents pants are some of my favorite for Starfinder characters. You’ll note here that the pants actually carried over the novelty black paint I used for the censor bar; this is important, as it lets you swap between colors pretty easy.
-
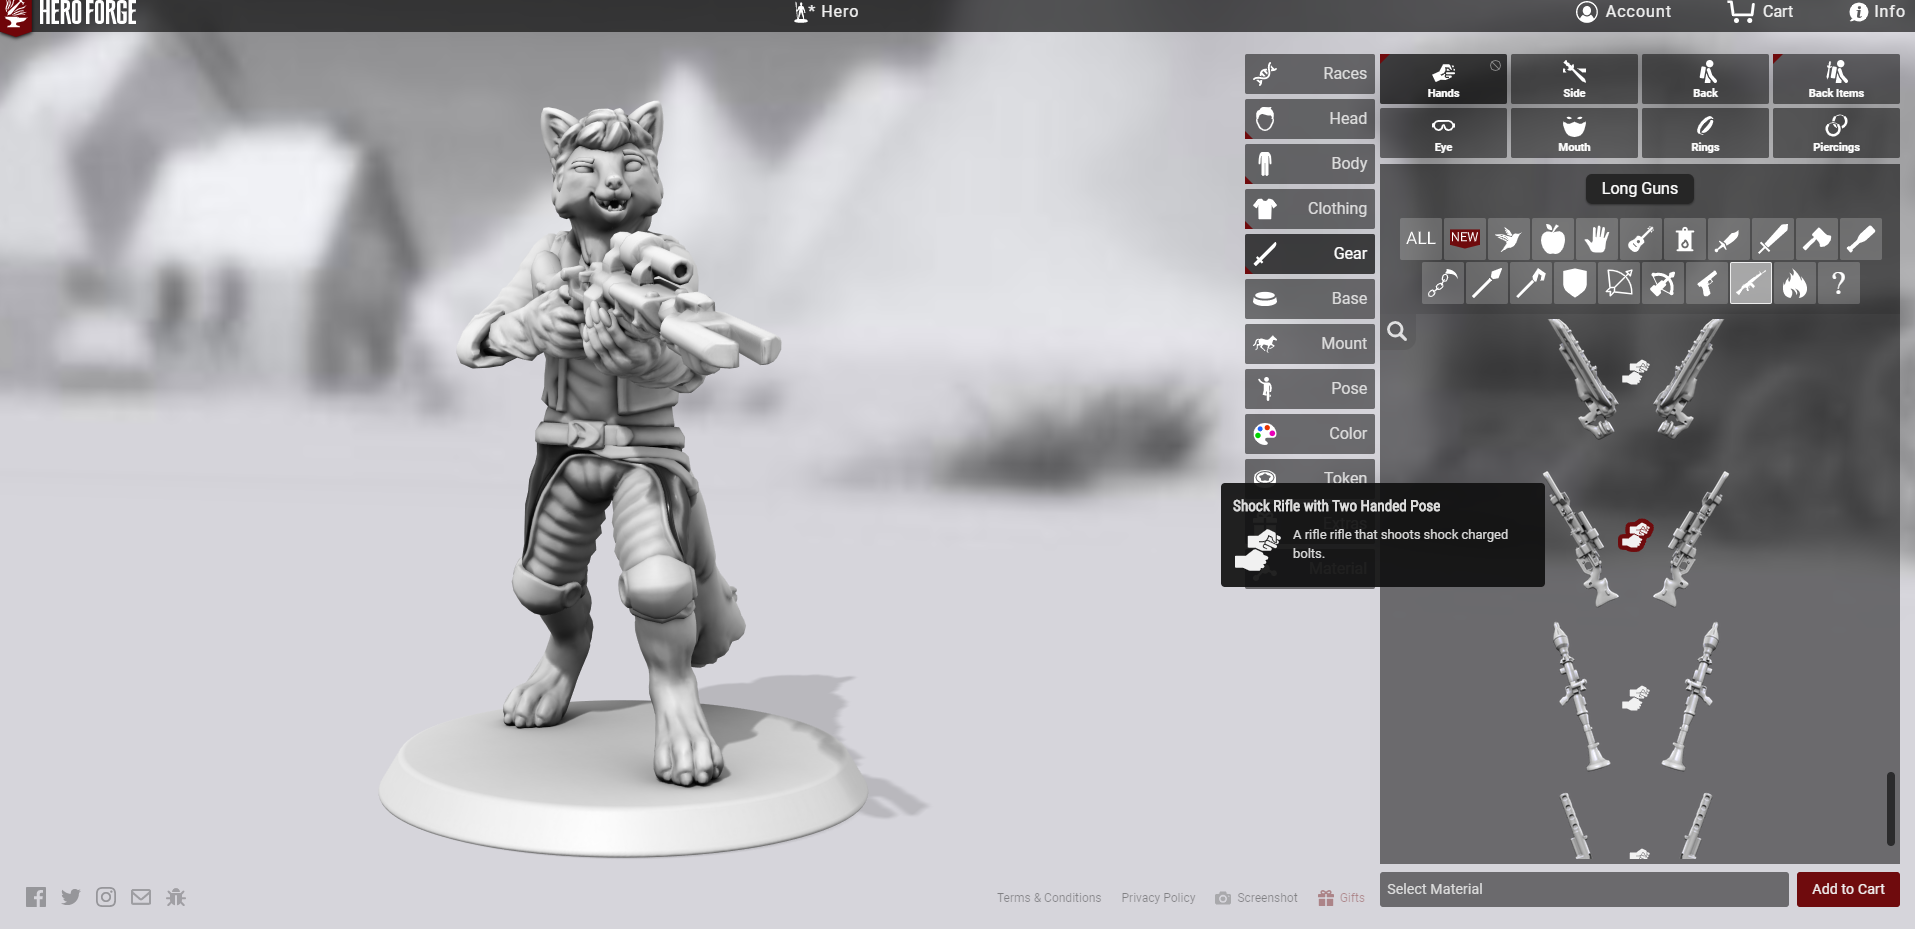
- I’m satisfied with Hansune’s outfit, so let’s move on to GEAR! Step 7 lets us pick stuff like weaponry, and since Hansune is carrying that big sniper rifle I thought something similar would be a good fit for him.
-
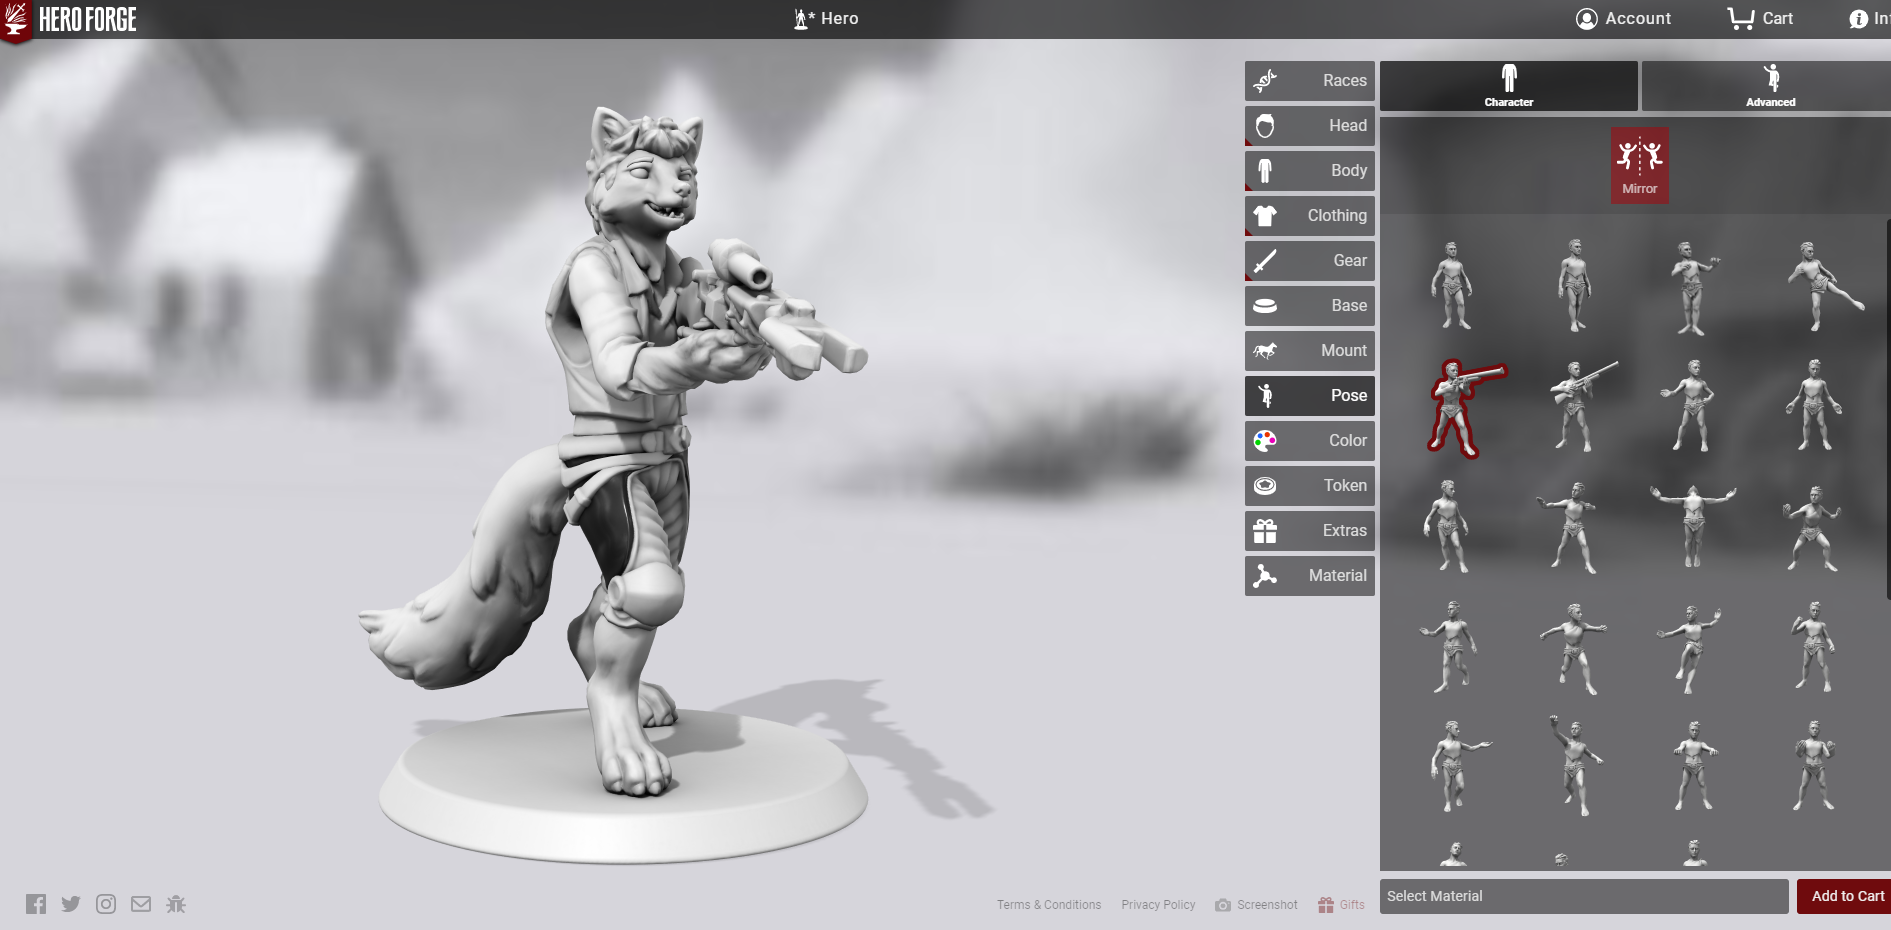
- Fast-forwarding a bit, the default pose as your character holding the stock with their left hand and the trigger with their right hand. I’m left-handed, and like my characters to be left-handed too. You can actually simulate that by going to the Posing Tool and clicking mirror, which causes all of your choices to be reversed.
-
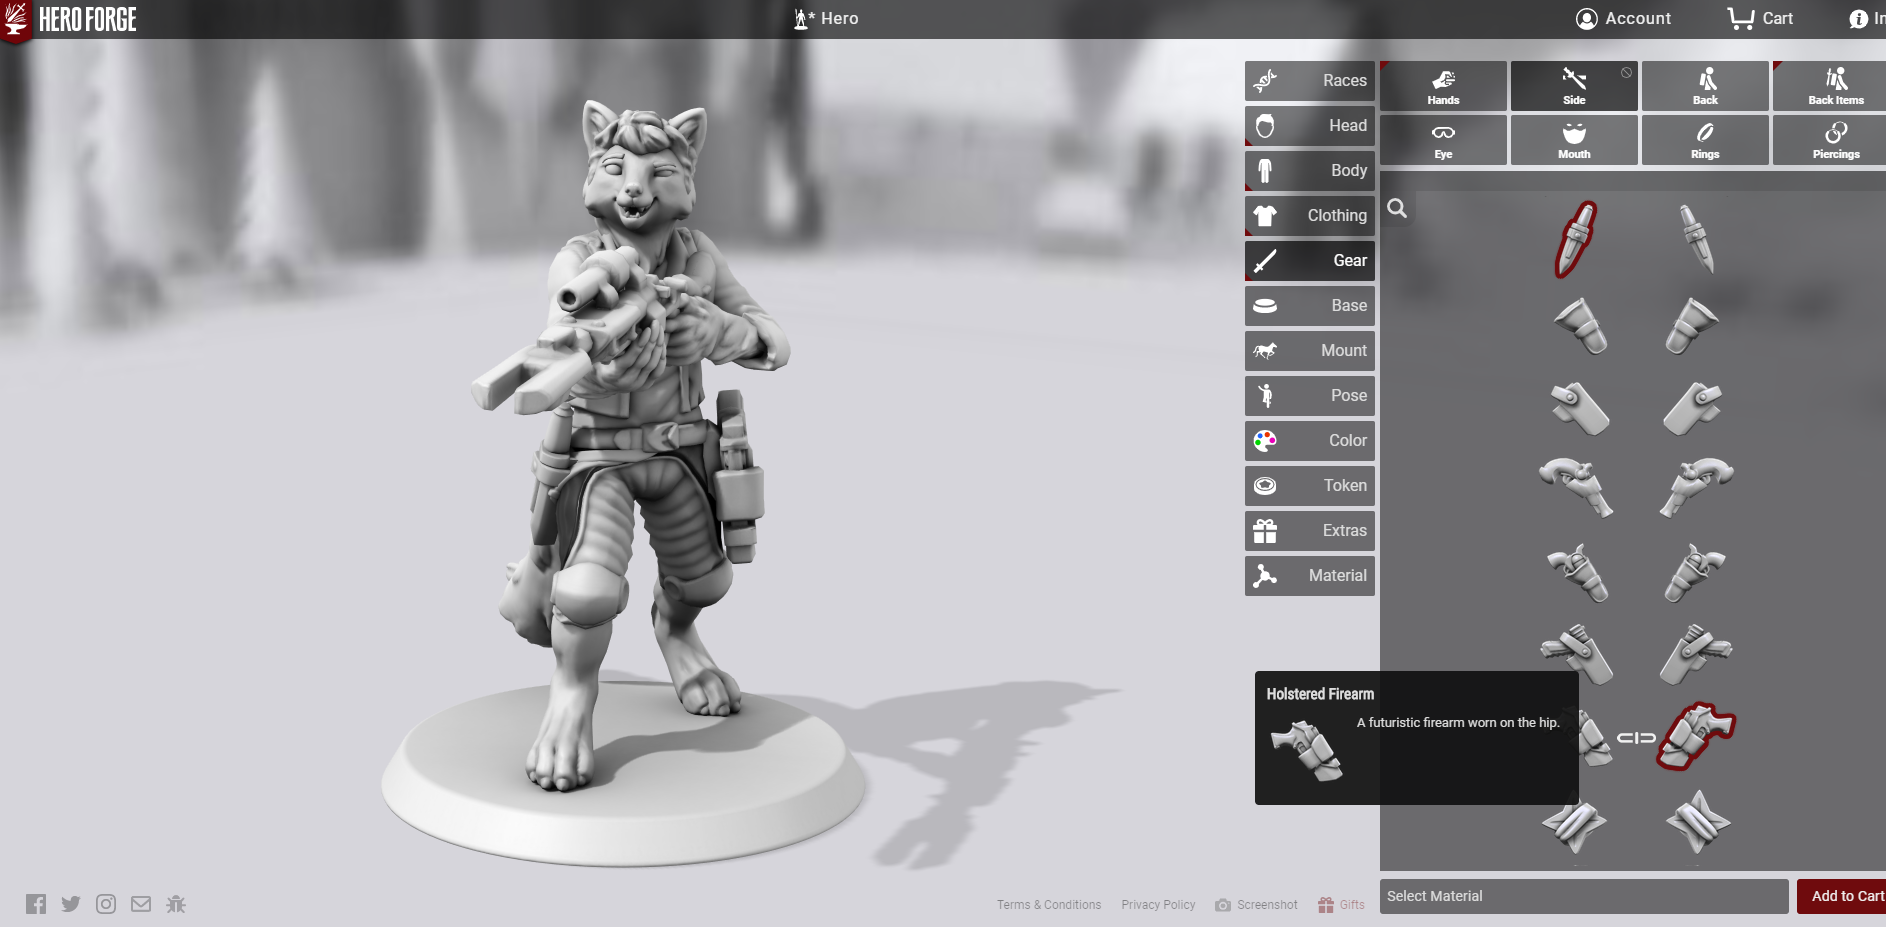
- After your main weapon, you can choose side items! I gave Hansune a dagger and a holstered small arm, for when you gotta have those Trick Attack damage dice!
-
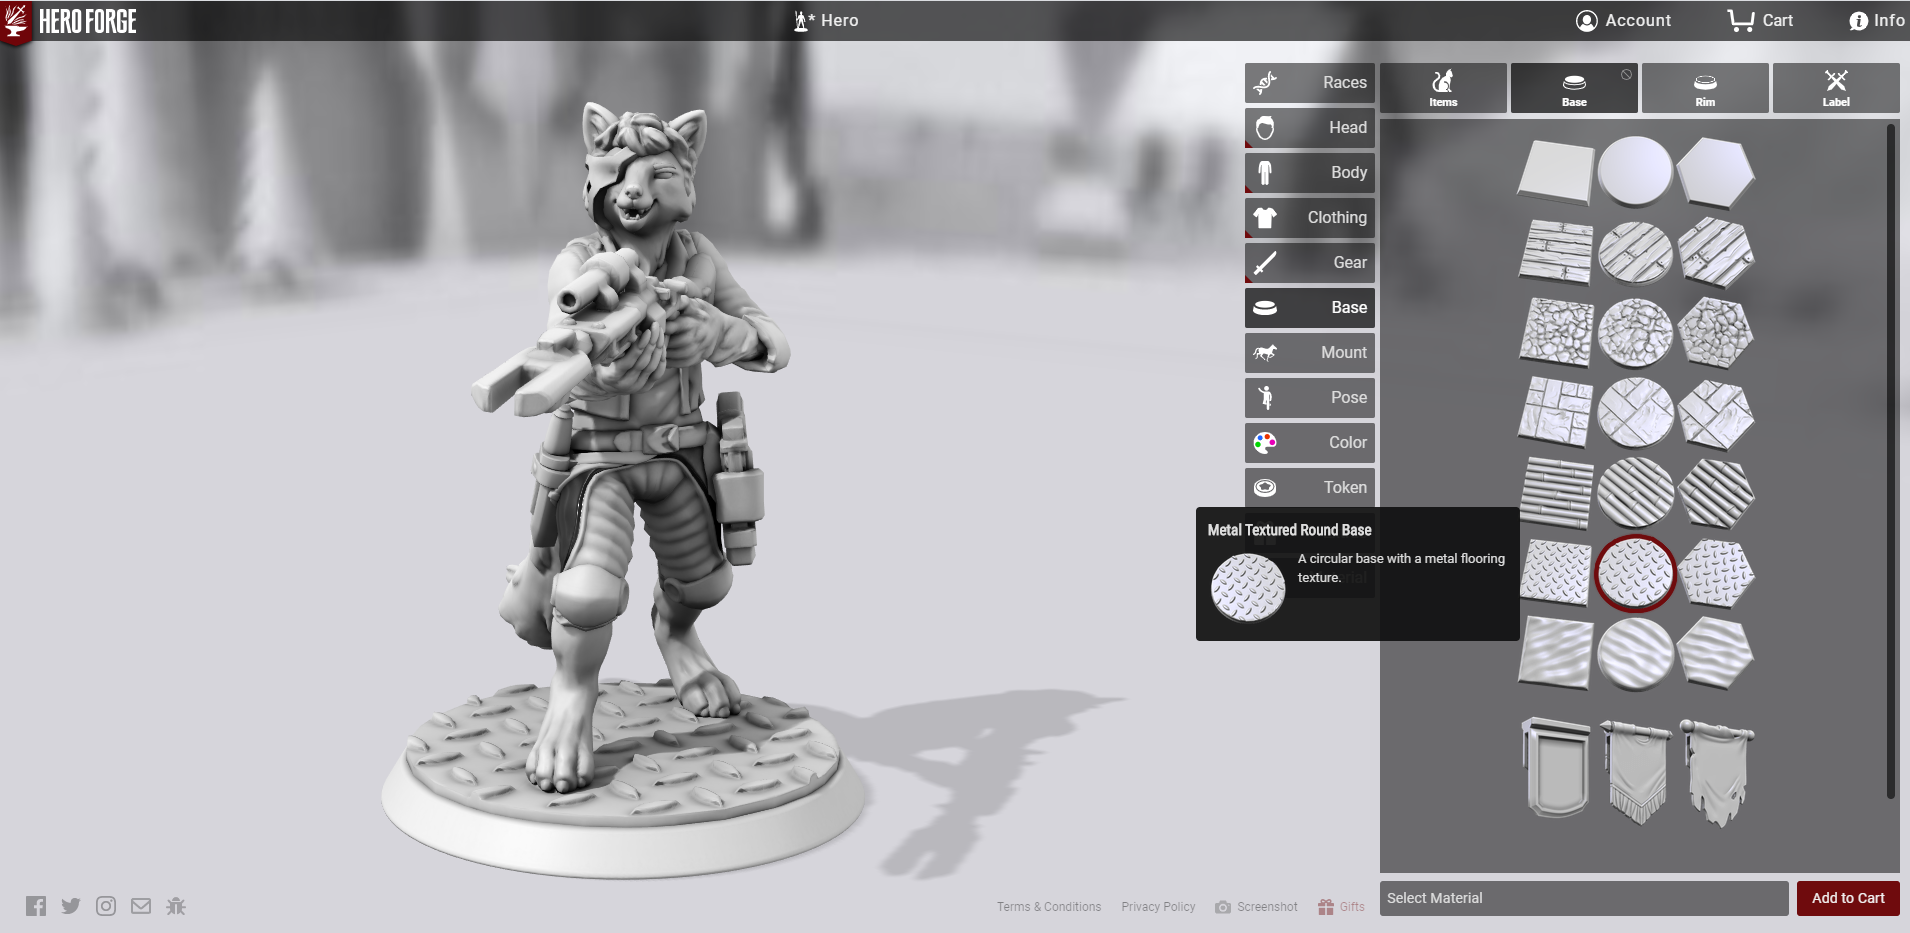
- There are a TON of other options you can pick from! I gave Hansune his signature eye patch (the mirror tool is necessary to get it on his right eye). Hansune doesn’t have any piercings, rings, or mouth coverings, so the last thing I did after adding the eye patch was to go into the bases option and give him a cool, metallic platform to stand on.
-
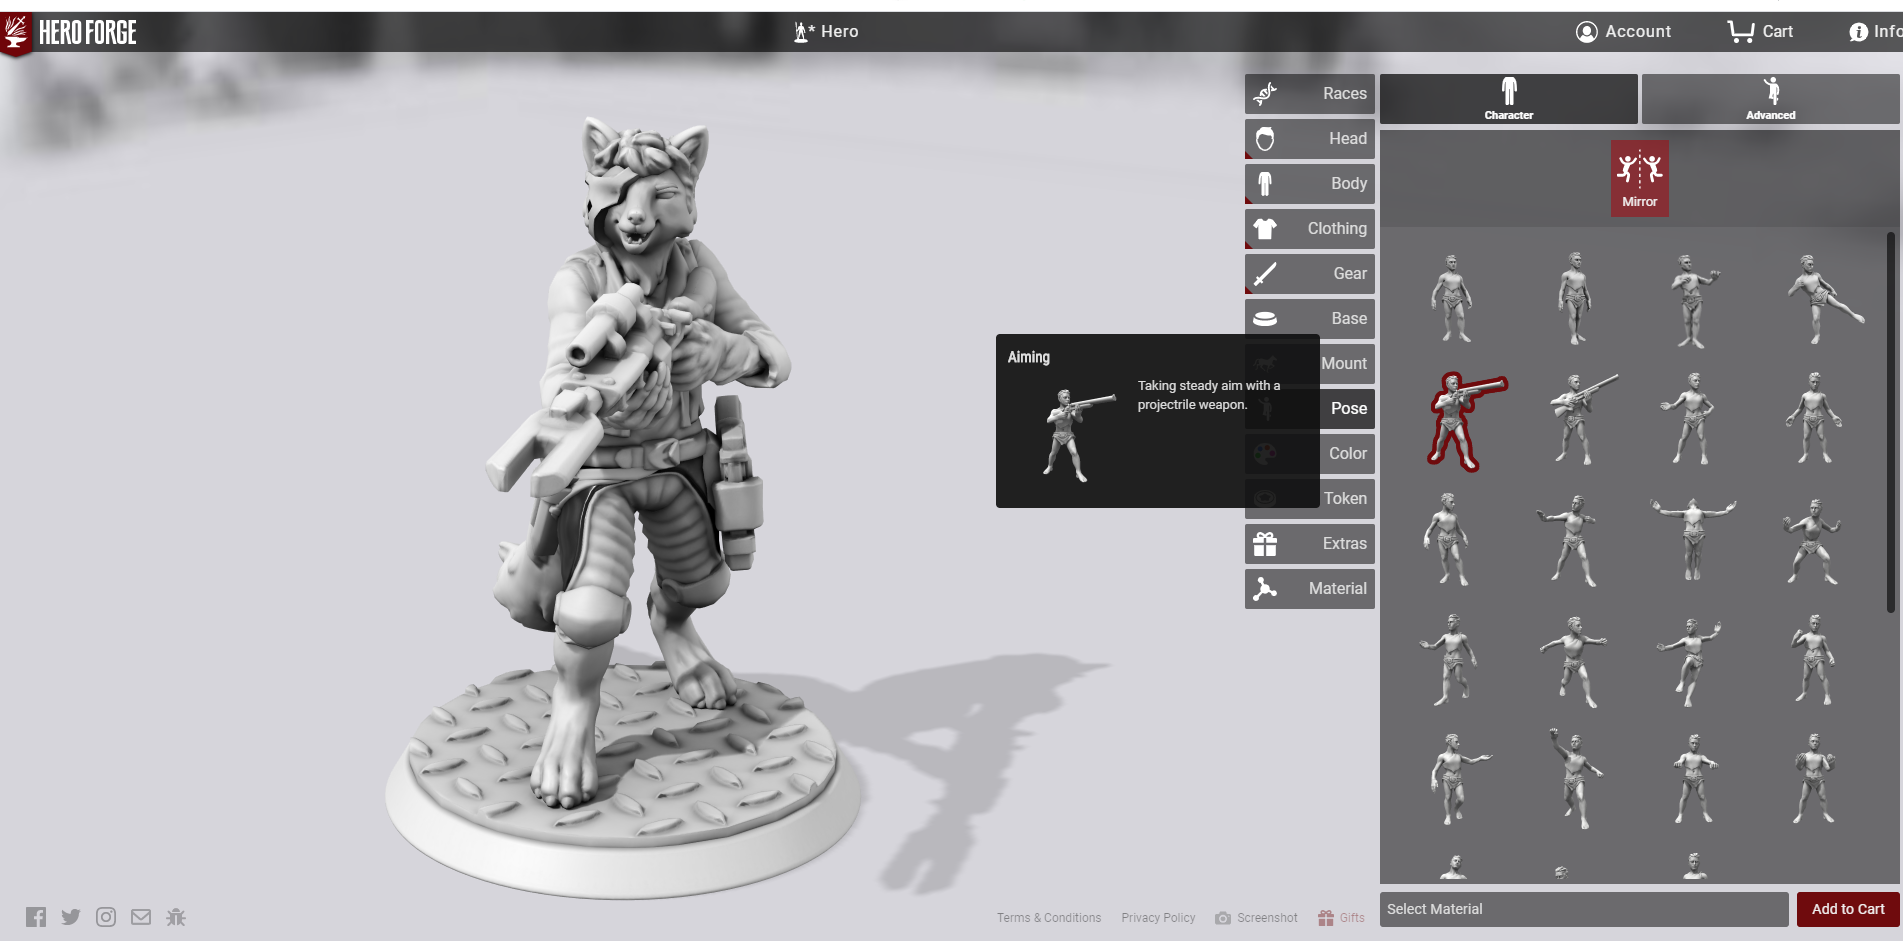
- I didn’t use this tool, but shout-out to advanced posing; not only are there TONS of poses to choose from, but you can customize your character’s position in all of them using the advanced posing tool.
-

- HeroForge Color has a ton of tools specifically designed to make coloring your miniature fast and easy. The Race option lets you pick from a number of predesigned color templates that apply exclusively to your miniature’s body, while theme applies color palettes specifically to their clothing and gear. Personally, I don’t use these tools when I’m designing miniatures, especially kitsune. Currently, the race tool applies a single color to basically everything and works best for elves, dwarves, and similar species.
-

- In contrast to the Race tool, the Theme tool is super useful. The color palettes they apply actually look really nice on a variety of armor types. Again, I’m a meticulous person who is going to want to customize every shade of color on my minis, but if you like one of the color themes I recommend this tool; the styles all look good.
-
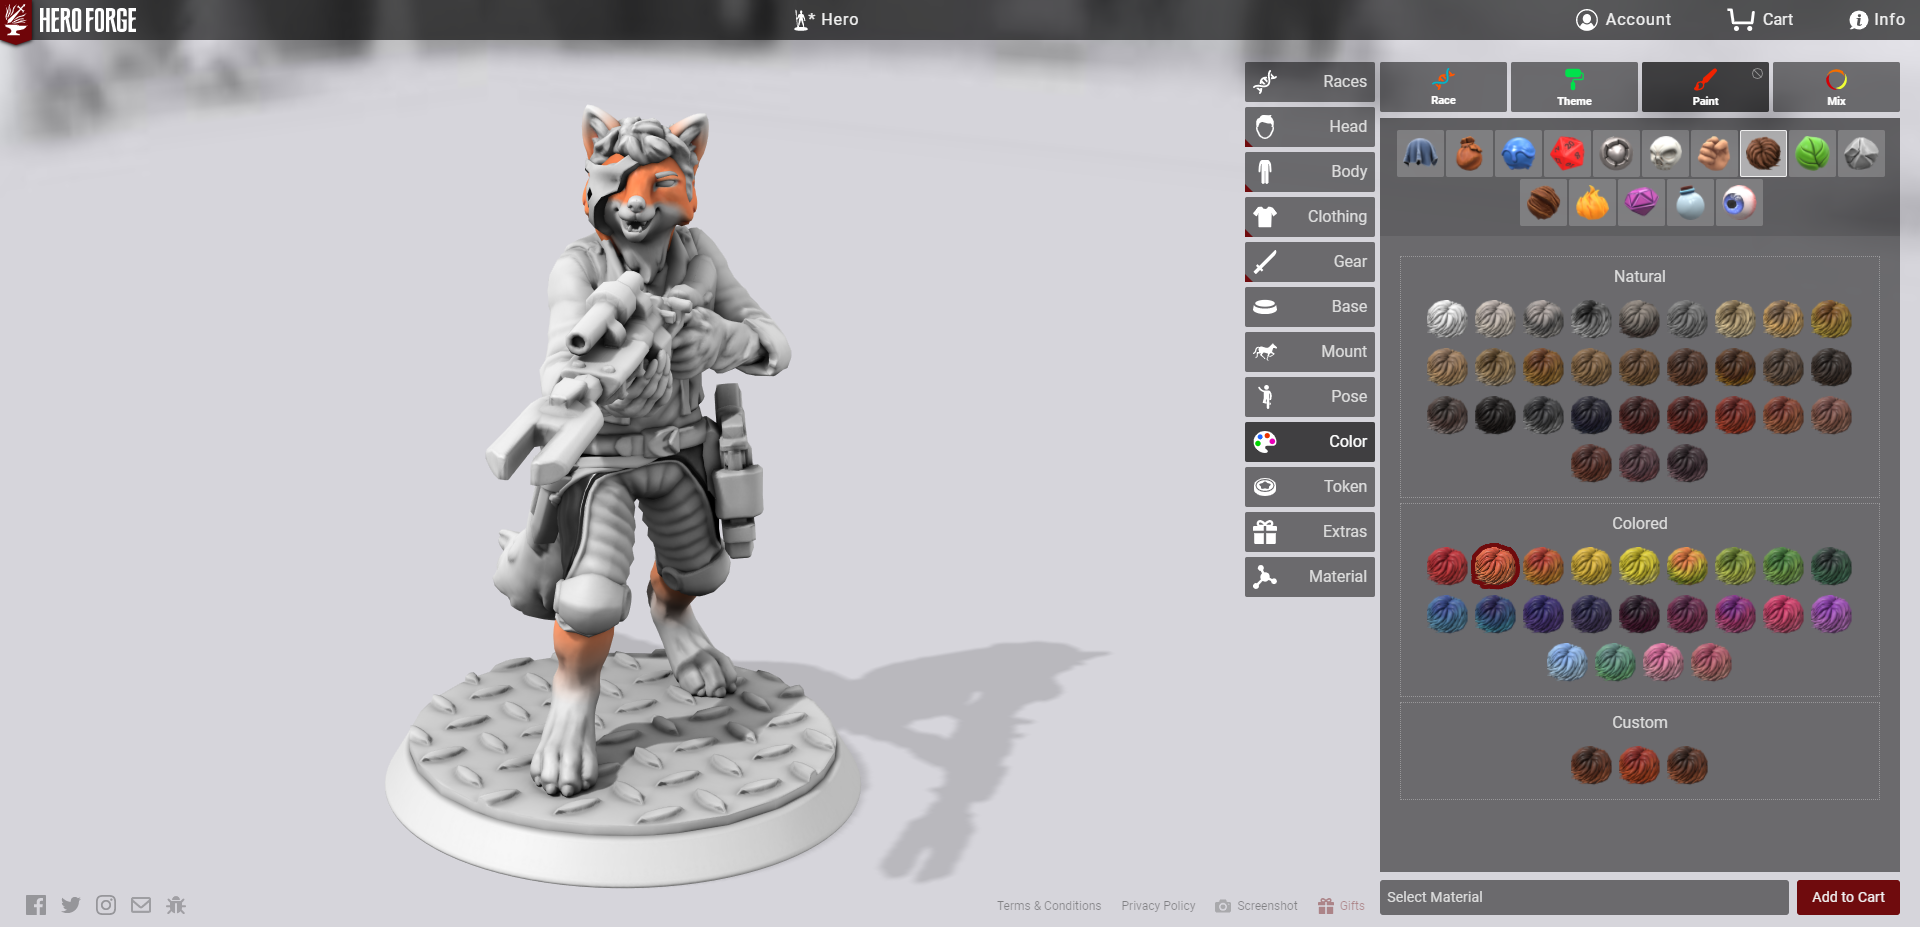
- The paint tool—this is where the magic happens! Paints are divided up by texture, and you can REALLY see how those textures look differently depending on what they’re used on. Here, I’m using the orange hair color option to start coloring in Hansune’s fur. I also will be using Sauteed Mushroom Brown for the brown bits and Old Salt for the white bits.
-
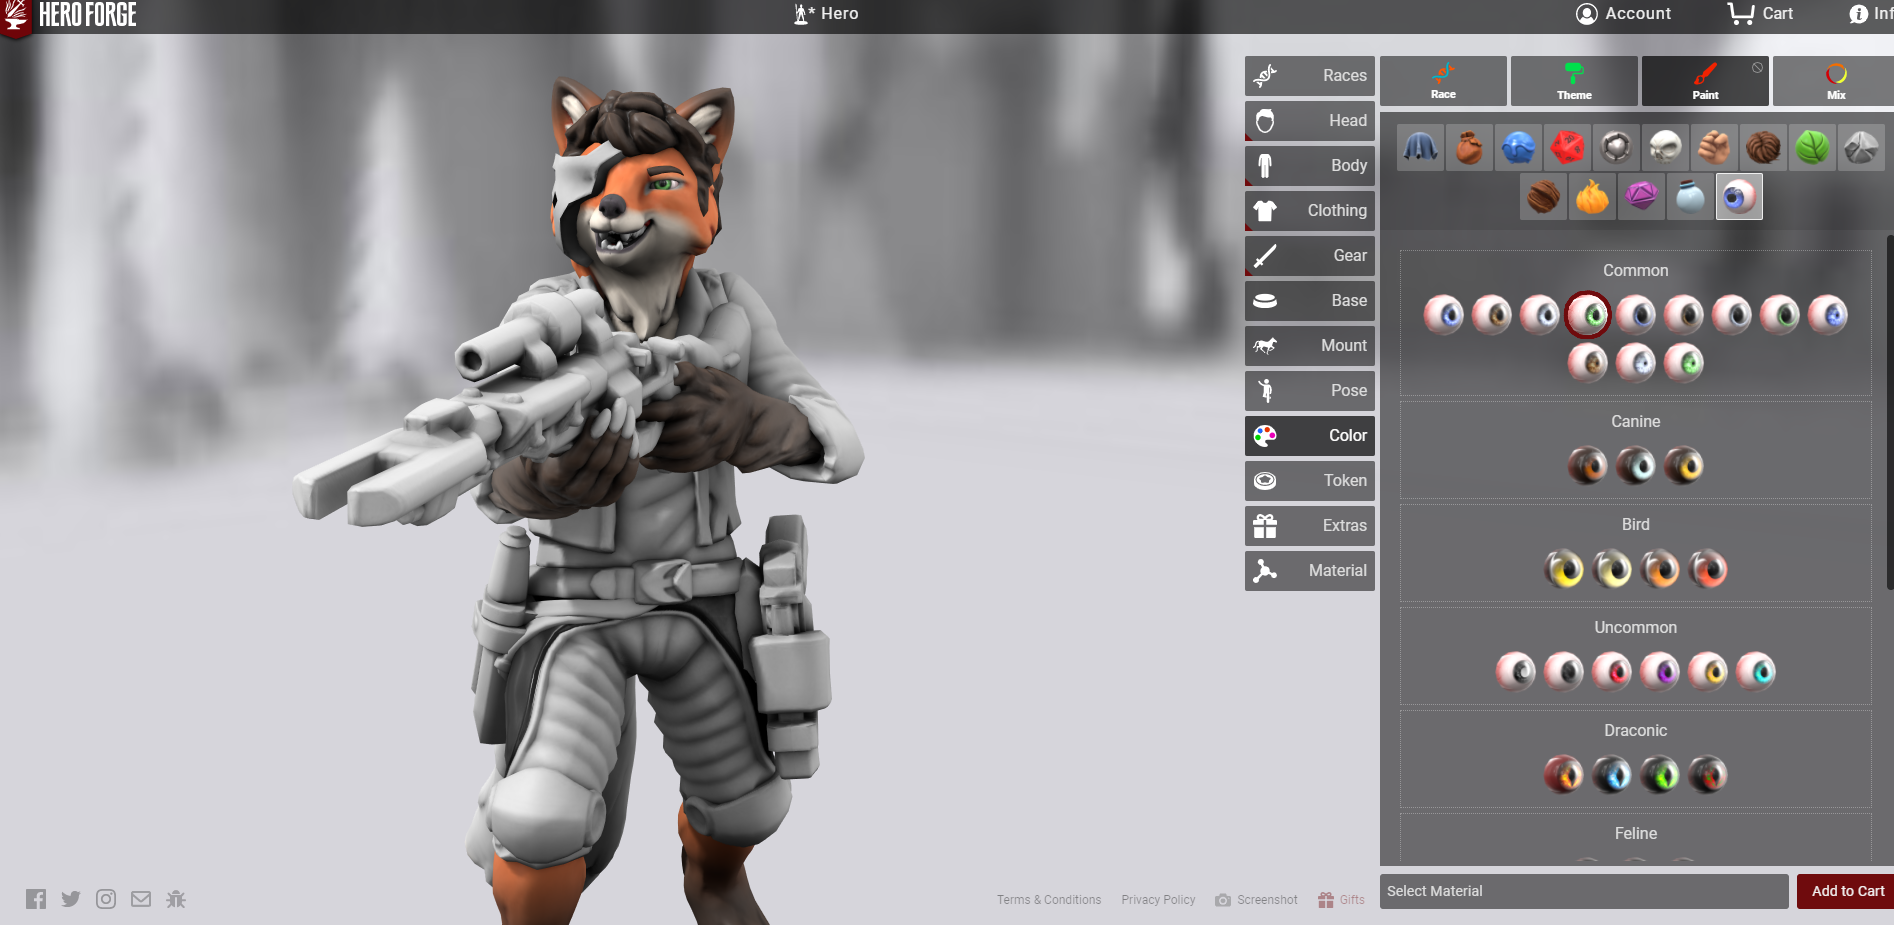
- I’m not going to go over every small aspect of the painting process because it’s pretty simple; you pick a color you like and you click where you want it to go. The model parts are very smart; its very easy to hit the places you want while avoiding the places you don’t. You basically hover over a part with your mouse and it applies the color to that whole part seamlessly. A single click applies the color. Here, you can see me applying eye coloring to the miniature. If you recall in the Body section, there was a slider for where the eyes are looking; that doesn’t matter for a non-colored miniature, but if you use the eye color paint tool the eyes will follow precisely where you told them to go, even back into the mini’s own school for a creepy possessed look!
-
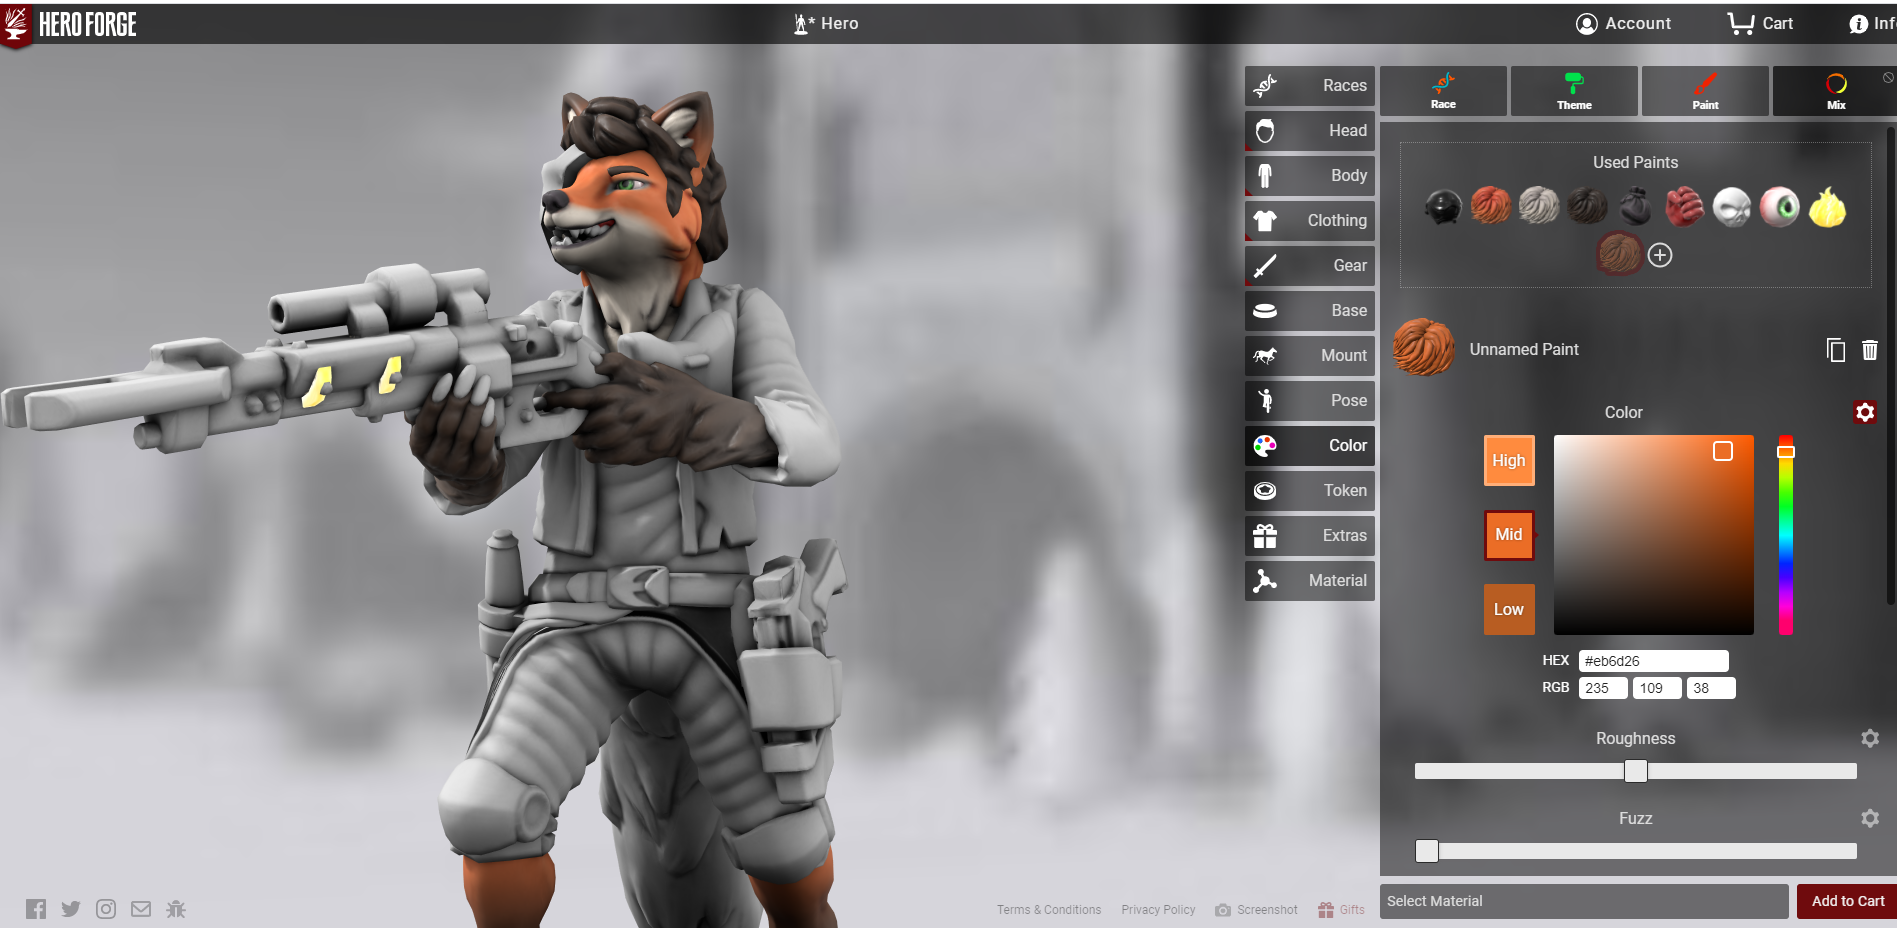
- Two more things I want to call out here; first is the “glow effects” paint, which you can see here on the gun. This is SUPER cool, as it lets you make awesome spell effects or sci-fi glowy bits. The other tool is under Mix, which also serves as a running record of every paint you’ve used on the mini (VERY helpful). Mix allows you to make your own paint colors using categories like wood or hair or clothing, and it applies the colors in a way that matches the style of paints in that category. There is an advanced selection tool that even allows you to simulate layering, with a “base” color, a “layer” color, and a “hightlight” color.
-
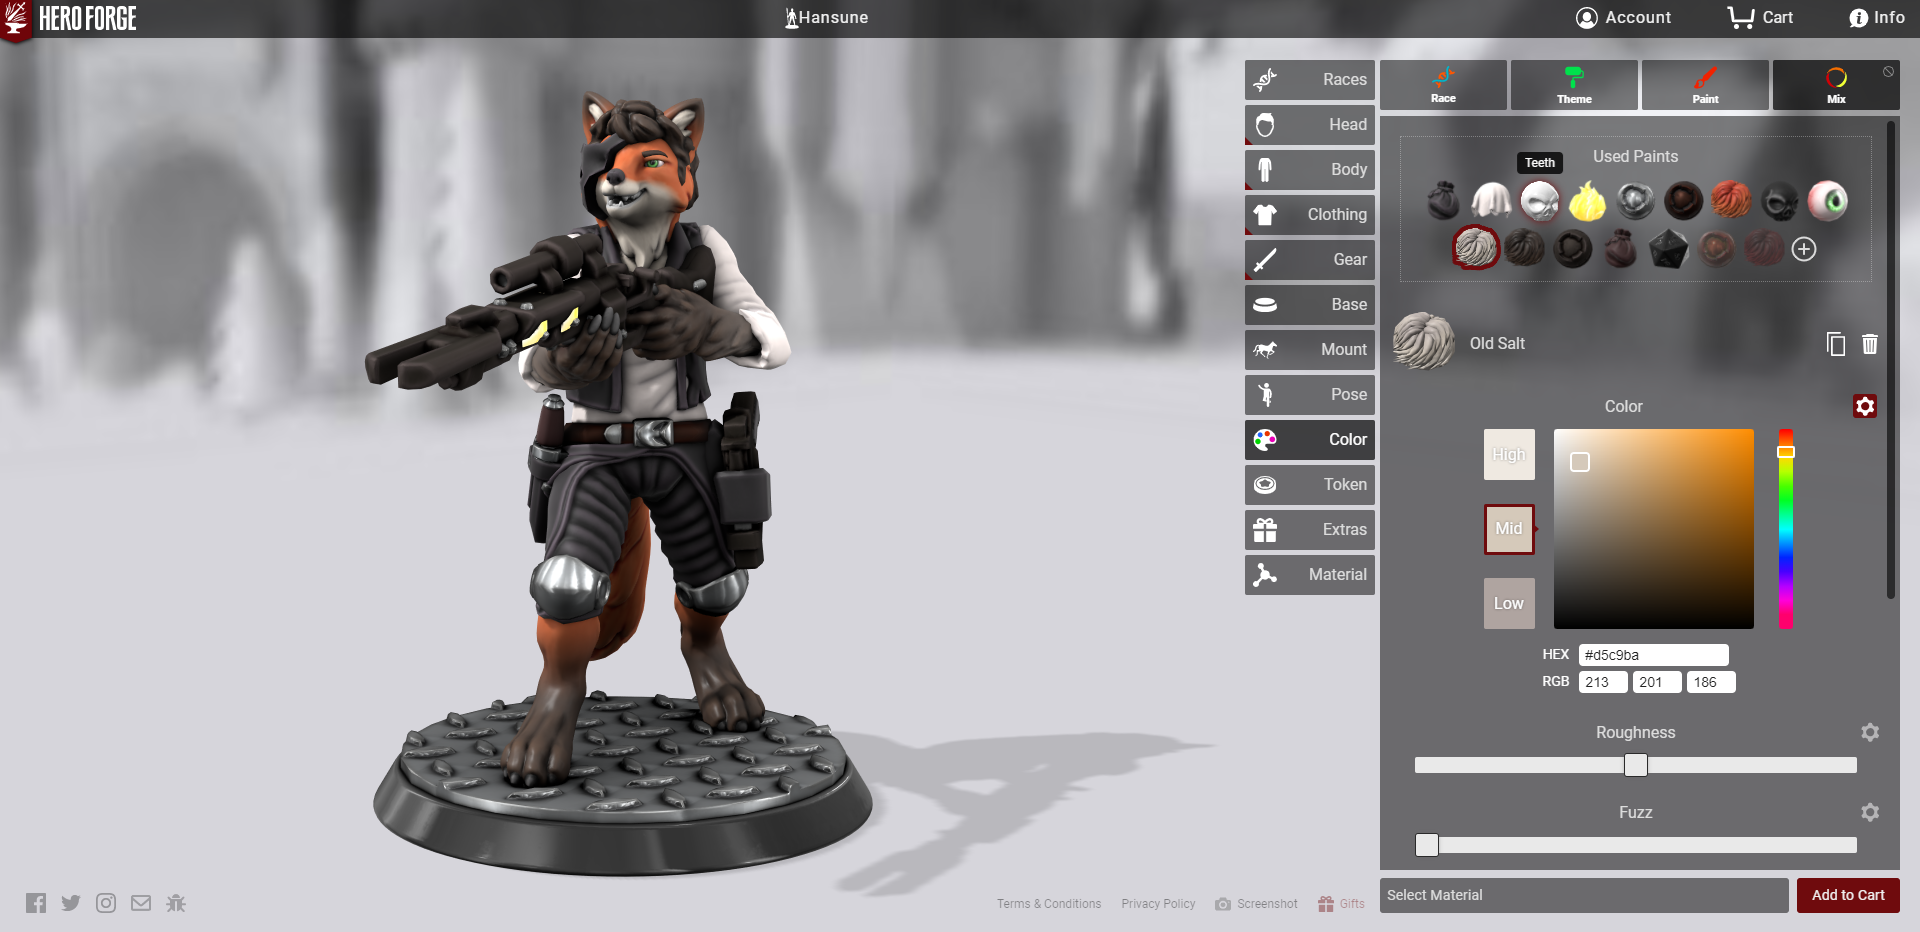
- Skipping ahead to when I slapped all the paint onto the miniature and named it, and he’s done! I’m REALLY impressed with how close to Jacob’s design I managed to get with this character, to be honest. It is a really good representation and looks great!
-
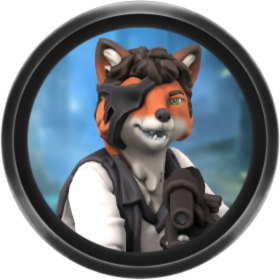
- Hansune’s appearance in the HeroForge Color interface for comparison.
HeroForge Products
HeroForge color has three primary products that you can purchase using the assets you’ve assembled using their 100% free 3D character building tools: they have a download, a printed plastic, and a token maker. A fourth product, professionally painted miniatures, is incoming but is currently unavailable to Beta testers.
Downloads
If you’re like the Know Direction Network’s own Perram, you might have a 3D Printer at home. And if that’s so, you can actually purchase the raw files from HeroForge that you can use to print your miniatures however you want. I don’t have a ton of experience in this regard, but I’ve downloaded HeroForge files before and had other companies who are cheaper than Shapeways (HeroForge’s printer) print them with varying levels of success; Shapeways is expensive, but they’re high-quality. Perram says that HeroForge is super generous with the tools they send you via this Export, and a skilled 3D modeler could essentially build a T-Pose rigging of their character using HeroForge’s software and remodel it however they want on their own. Of course, this would require a TON of work on your part, and HeroForge makes modeling easy enough with its Advanced Modeling tools! Finally, most of us aren’t going to have need for that level of fiddliness, but it’s something to keep in mind when choosing whether or not you want a Download of your miniature.
3D Printing
This is the service you *probably* came to HeroForge for. The printing tools allow you to print your miniature in a number of different materials, ranging from plastic, premium plastic, premium color plastic, steel, bronze, and pre-painted premium plastic. I’ll go over each of these options quickly, but I only have actual consumer experience with plastic, premium plastic, and premium color plastic. After each material’s name, I’ve noted how much it would cost to print my Hansune miniature in each material.
- Plastic (19.99 USD): This is the cheapest option, but it tends to have a rougher texture, which might make the miniature look weird. I don’t recommend this one; James had a miniature in this material, and while it looked nice and he enjoyed it very much, I didn’t think the colors sat well on the plastic, not compared to the premium plastic miniatures I’ve ordered. I would recommend this purchase if you’re like James, and want a custom miniature at an economic price and aren’t too concerned with how the miniature looks painted; after all, most people will only see it from table distance, and they look fine from that vantage.
- Premium Plastic ($29.99 USD): This is what I would recommend purchasing if you want a miniature that paints real nicely. The miniatures are extremely smooth when they arrive; next to no texture or roughage, and the plastic they’re sent to you in is decent at holding paint without any base coats (I still recommend base coats, however). I would recommend this purchase if you’re like Perram, and are planning to put a lot of time and effort into painting your miniature; premium plastic is for painters first and foremost, or for people who want their miniature to look good upon close inspection.
- Steel (34.99 USD): This is like Super Plastic; the miniature rough and bumpy because steel, but unlike the plastic or the premium plastic, this miniature is DURABLE. You are unlikely to harm this miniature ever. But be advised, this is BUMPY, and if you paint the miniature you will notice the texture. Furthermore, where you could take a file or some other tools and try to even out the plastic miniature, this is STEEL; good luck smoothing this miniature out! I recommend the Steel miniature if you’re like James AND you have a good reason as to why you need an extremely durable miniature; maybe you’re clumsy, maybe you have kids at home, maybe you’re just paranoid. All valid, all good reasons to invest in a steel miniature if you are okay with the very rough texture.
- Nylon Plastic (59.99 USD): You’re not going to use this, not likely anyway. Nylon Plastic is a white, rough, sandpapery finish that is basically like the standard plastic, but much more expensive. Why? Nylon Plastic is specifically priced assuming that you’re printing a “jumbo-sized” miniature. It’s for miniatures with up to a 2-inch base, so it needs to be sturdier to avoid the miniature’s delicate bits collapsing. Currently this is the only material available for such large miniatures, so you’ll use this if you want an XL miniature and you won’t if you don’t.
- Bronze (99.99 USD): If Steel is Super Plastic, than Bronze is Super Premium Plastic. This is a heavy-duty material that prints smooth. I’ll be honest, I’ve never seen a Bronze miniature in-person so I can’t comment on their quality. That $100 USD price tag is more then I can afford for a miniature, but if you want a miniature that you can paint to be smooth and gorgeous while also being reasonably impervious to damage, consider bronze if (and only if) you have the money to spend. In any case, I would only drop for a bronze miniature for a character that I knew I was going to be playing a long time, and that I knew the GM would work with me if my character died so I didn’t waste $100 USD on a fancy mini that I had to shelve.
Premium Color Plastic (44.99 USD)
Here’s the topic you’ve been waiting for though, right? You want to know how my Hansune miniature, which was printed using color plastic, looks. That’s the new, revolutionary technology after all! I can’t blame you for being curious. Well, don’t you worry—I HAVE received my miniature, and I will GLADLY show you what it looks like!
-
- Hansune’s concept art for comparison.
-
- Hansune’s appearance in the HeroForge Color interface for comparison.
-

- Front
-
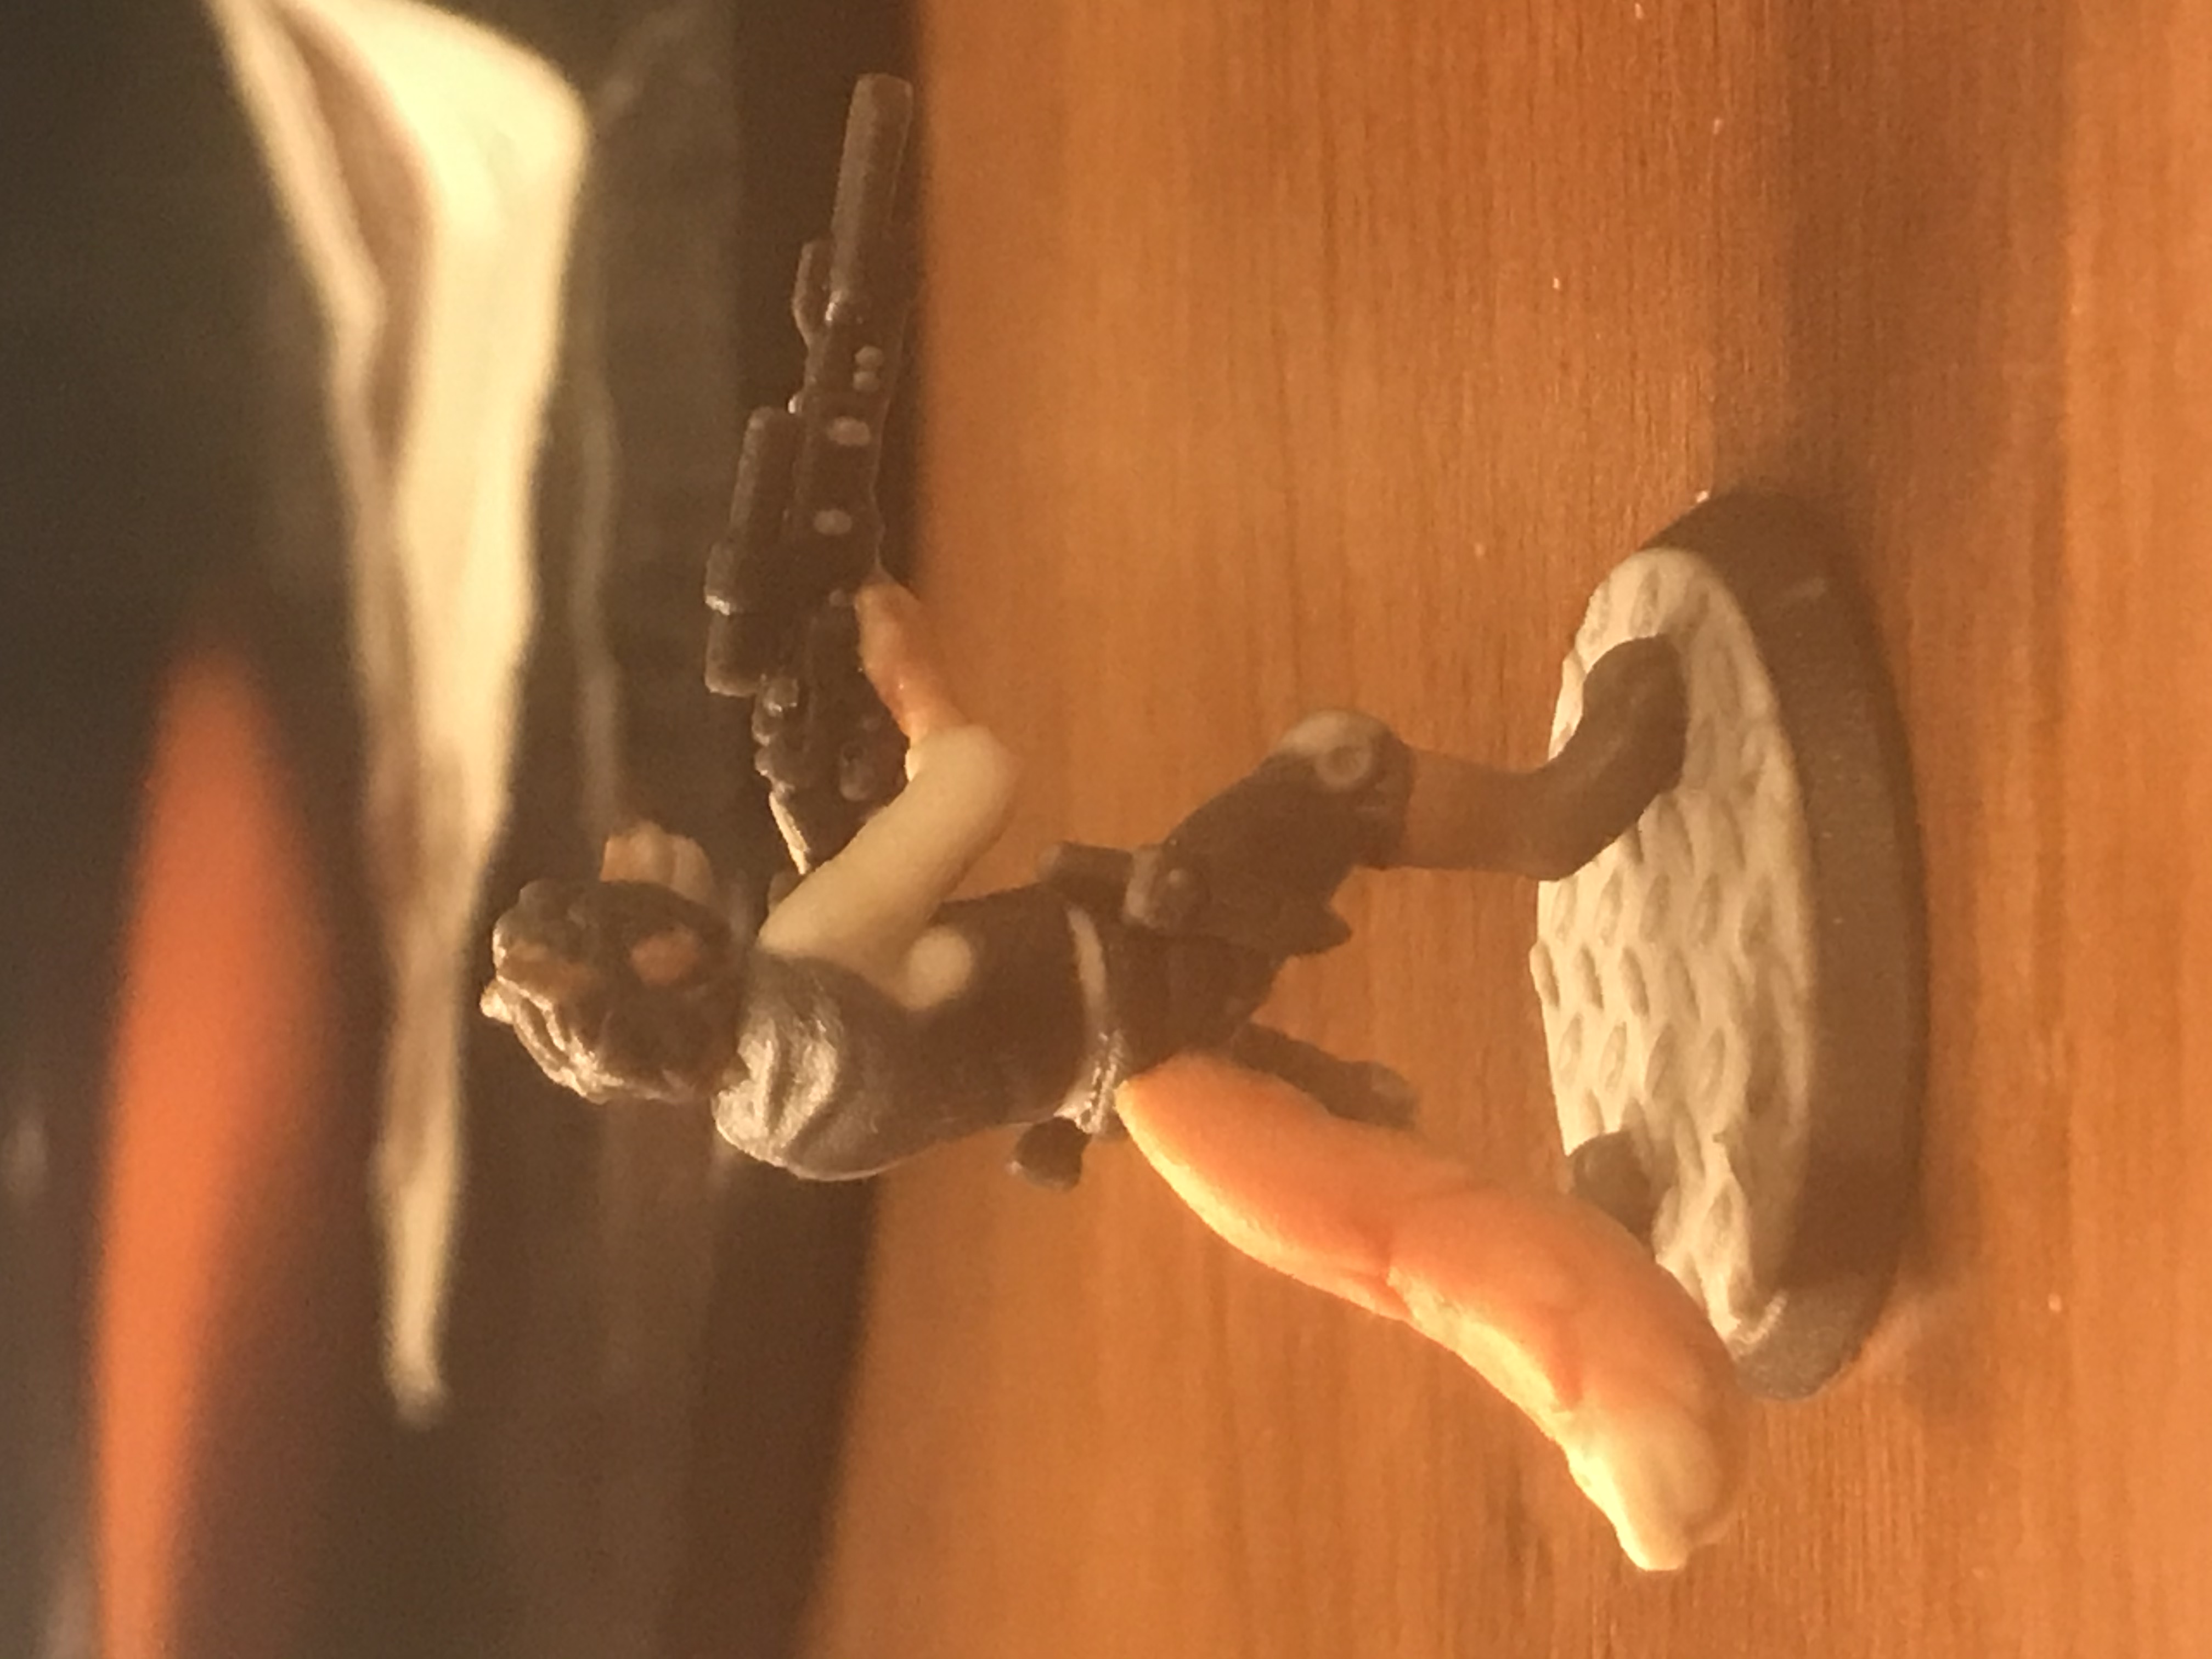
- Back
-
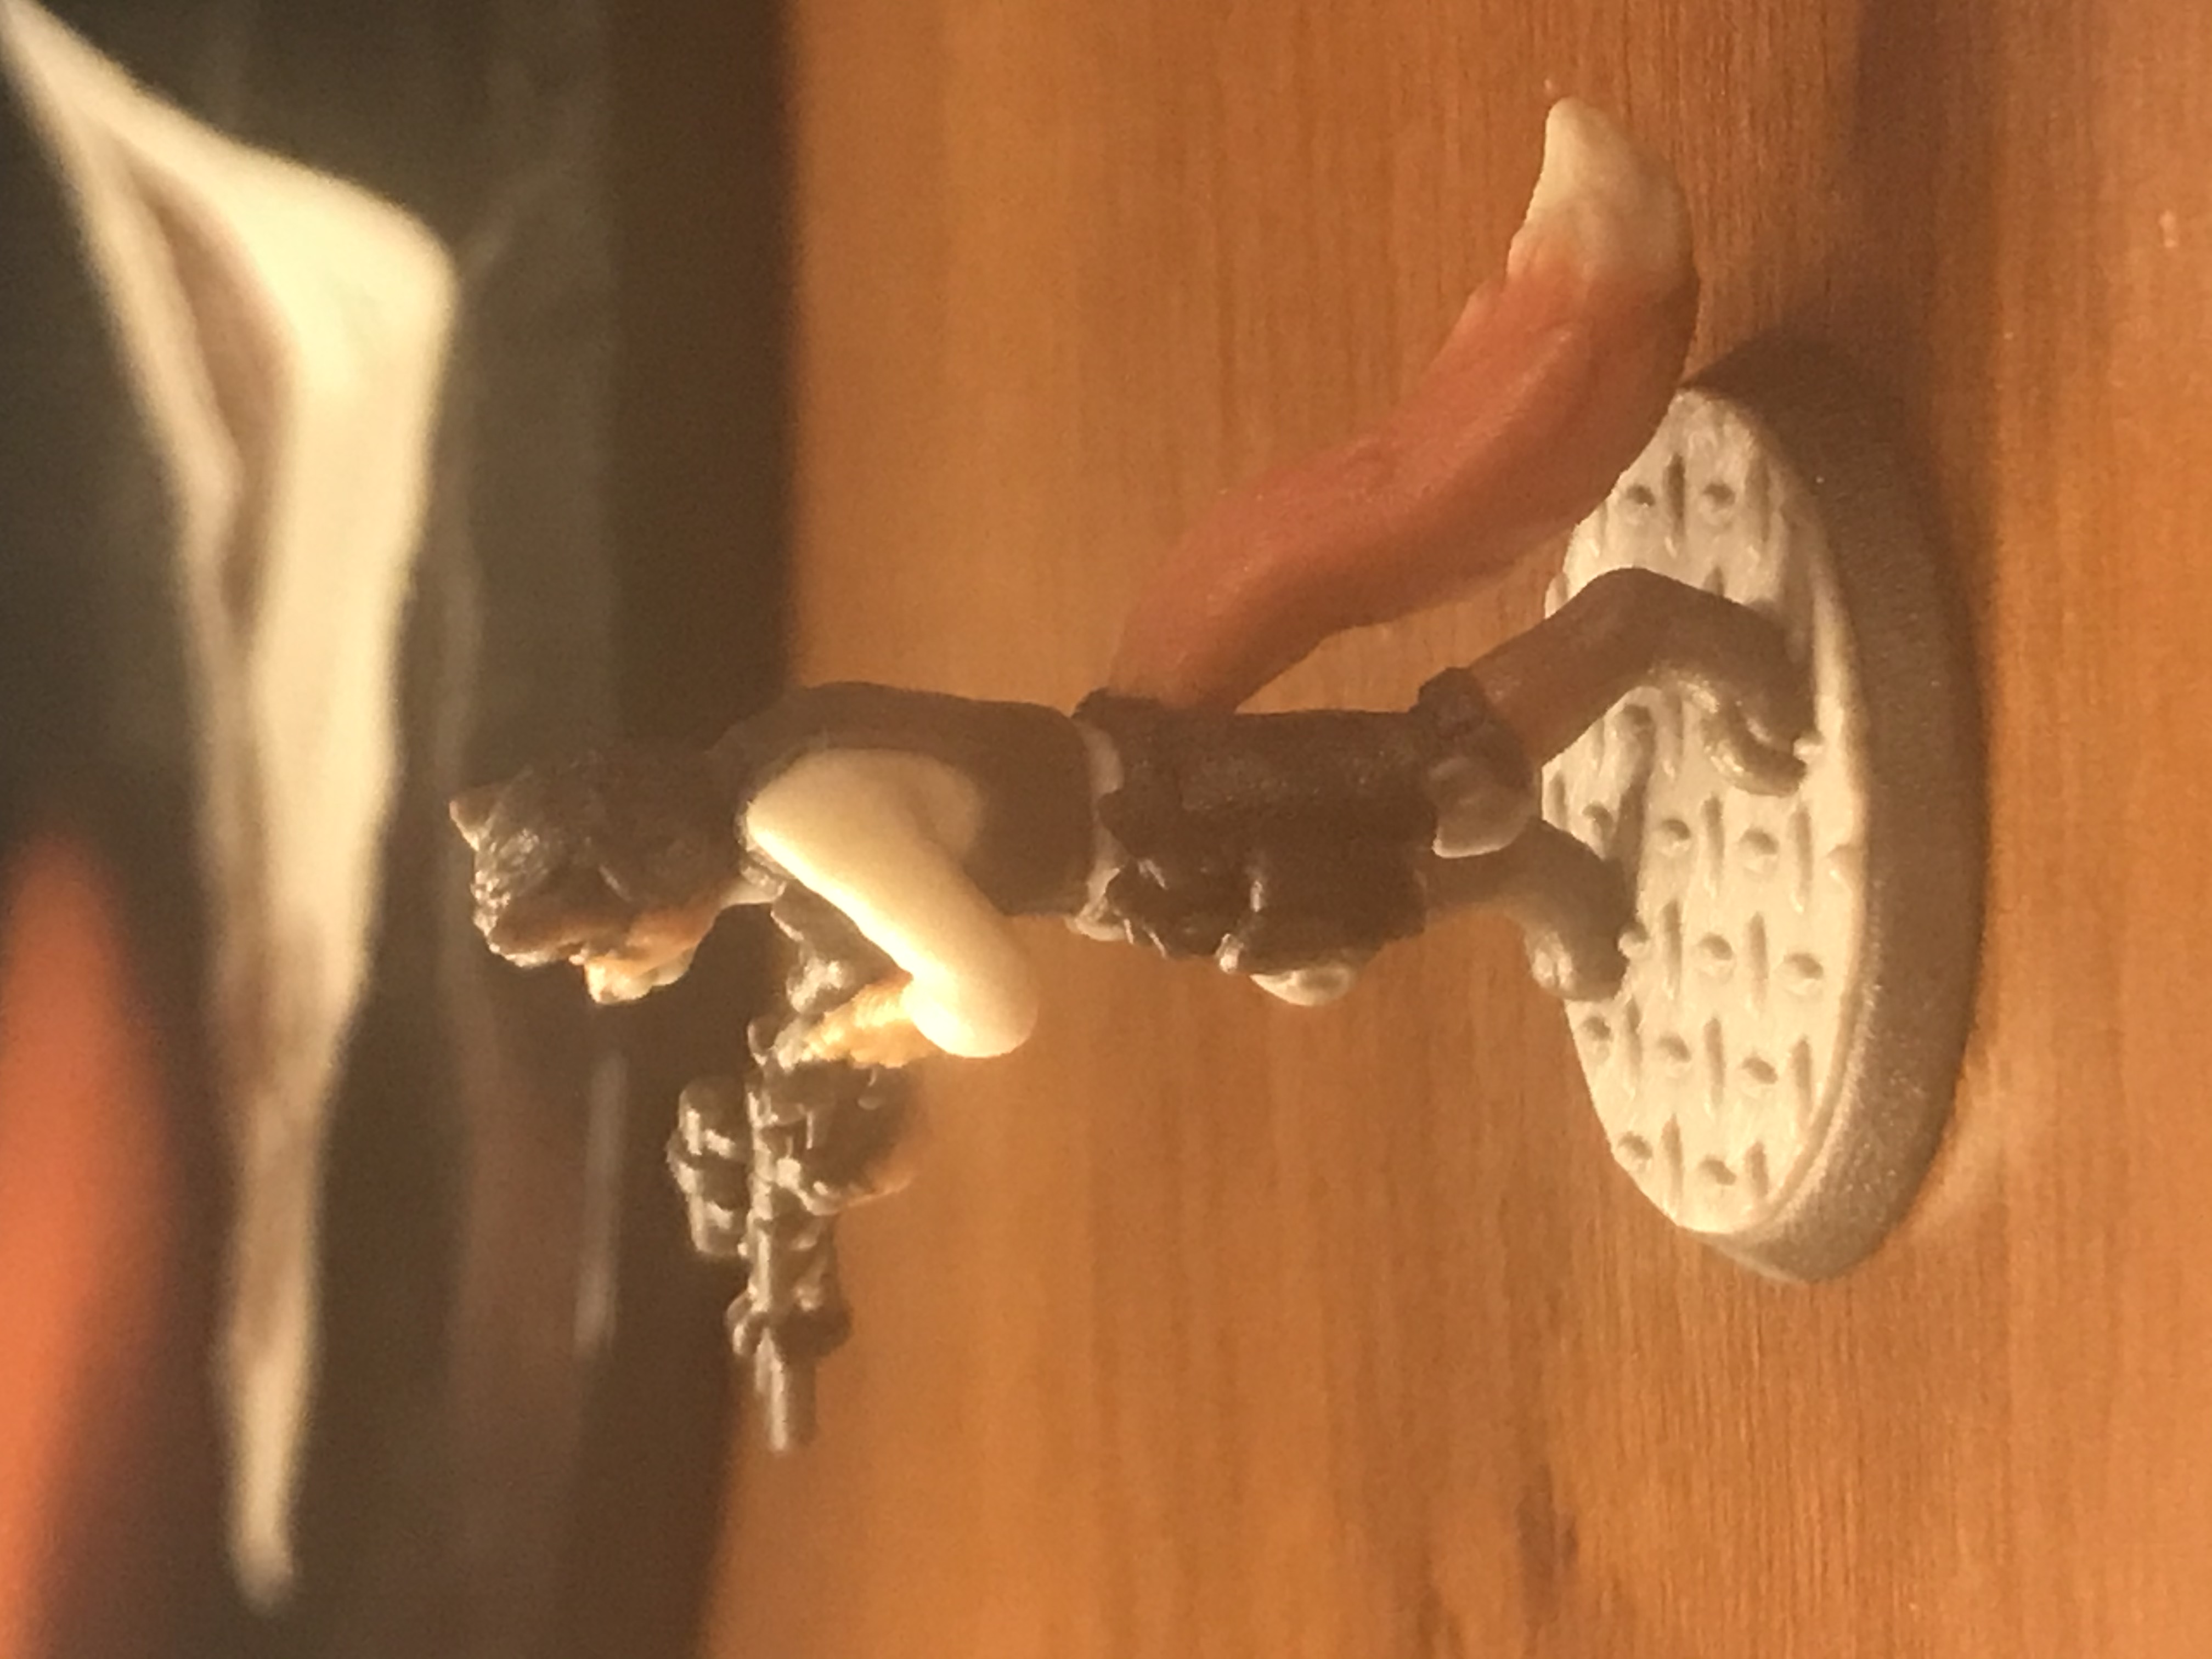
- Side
-
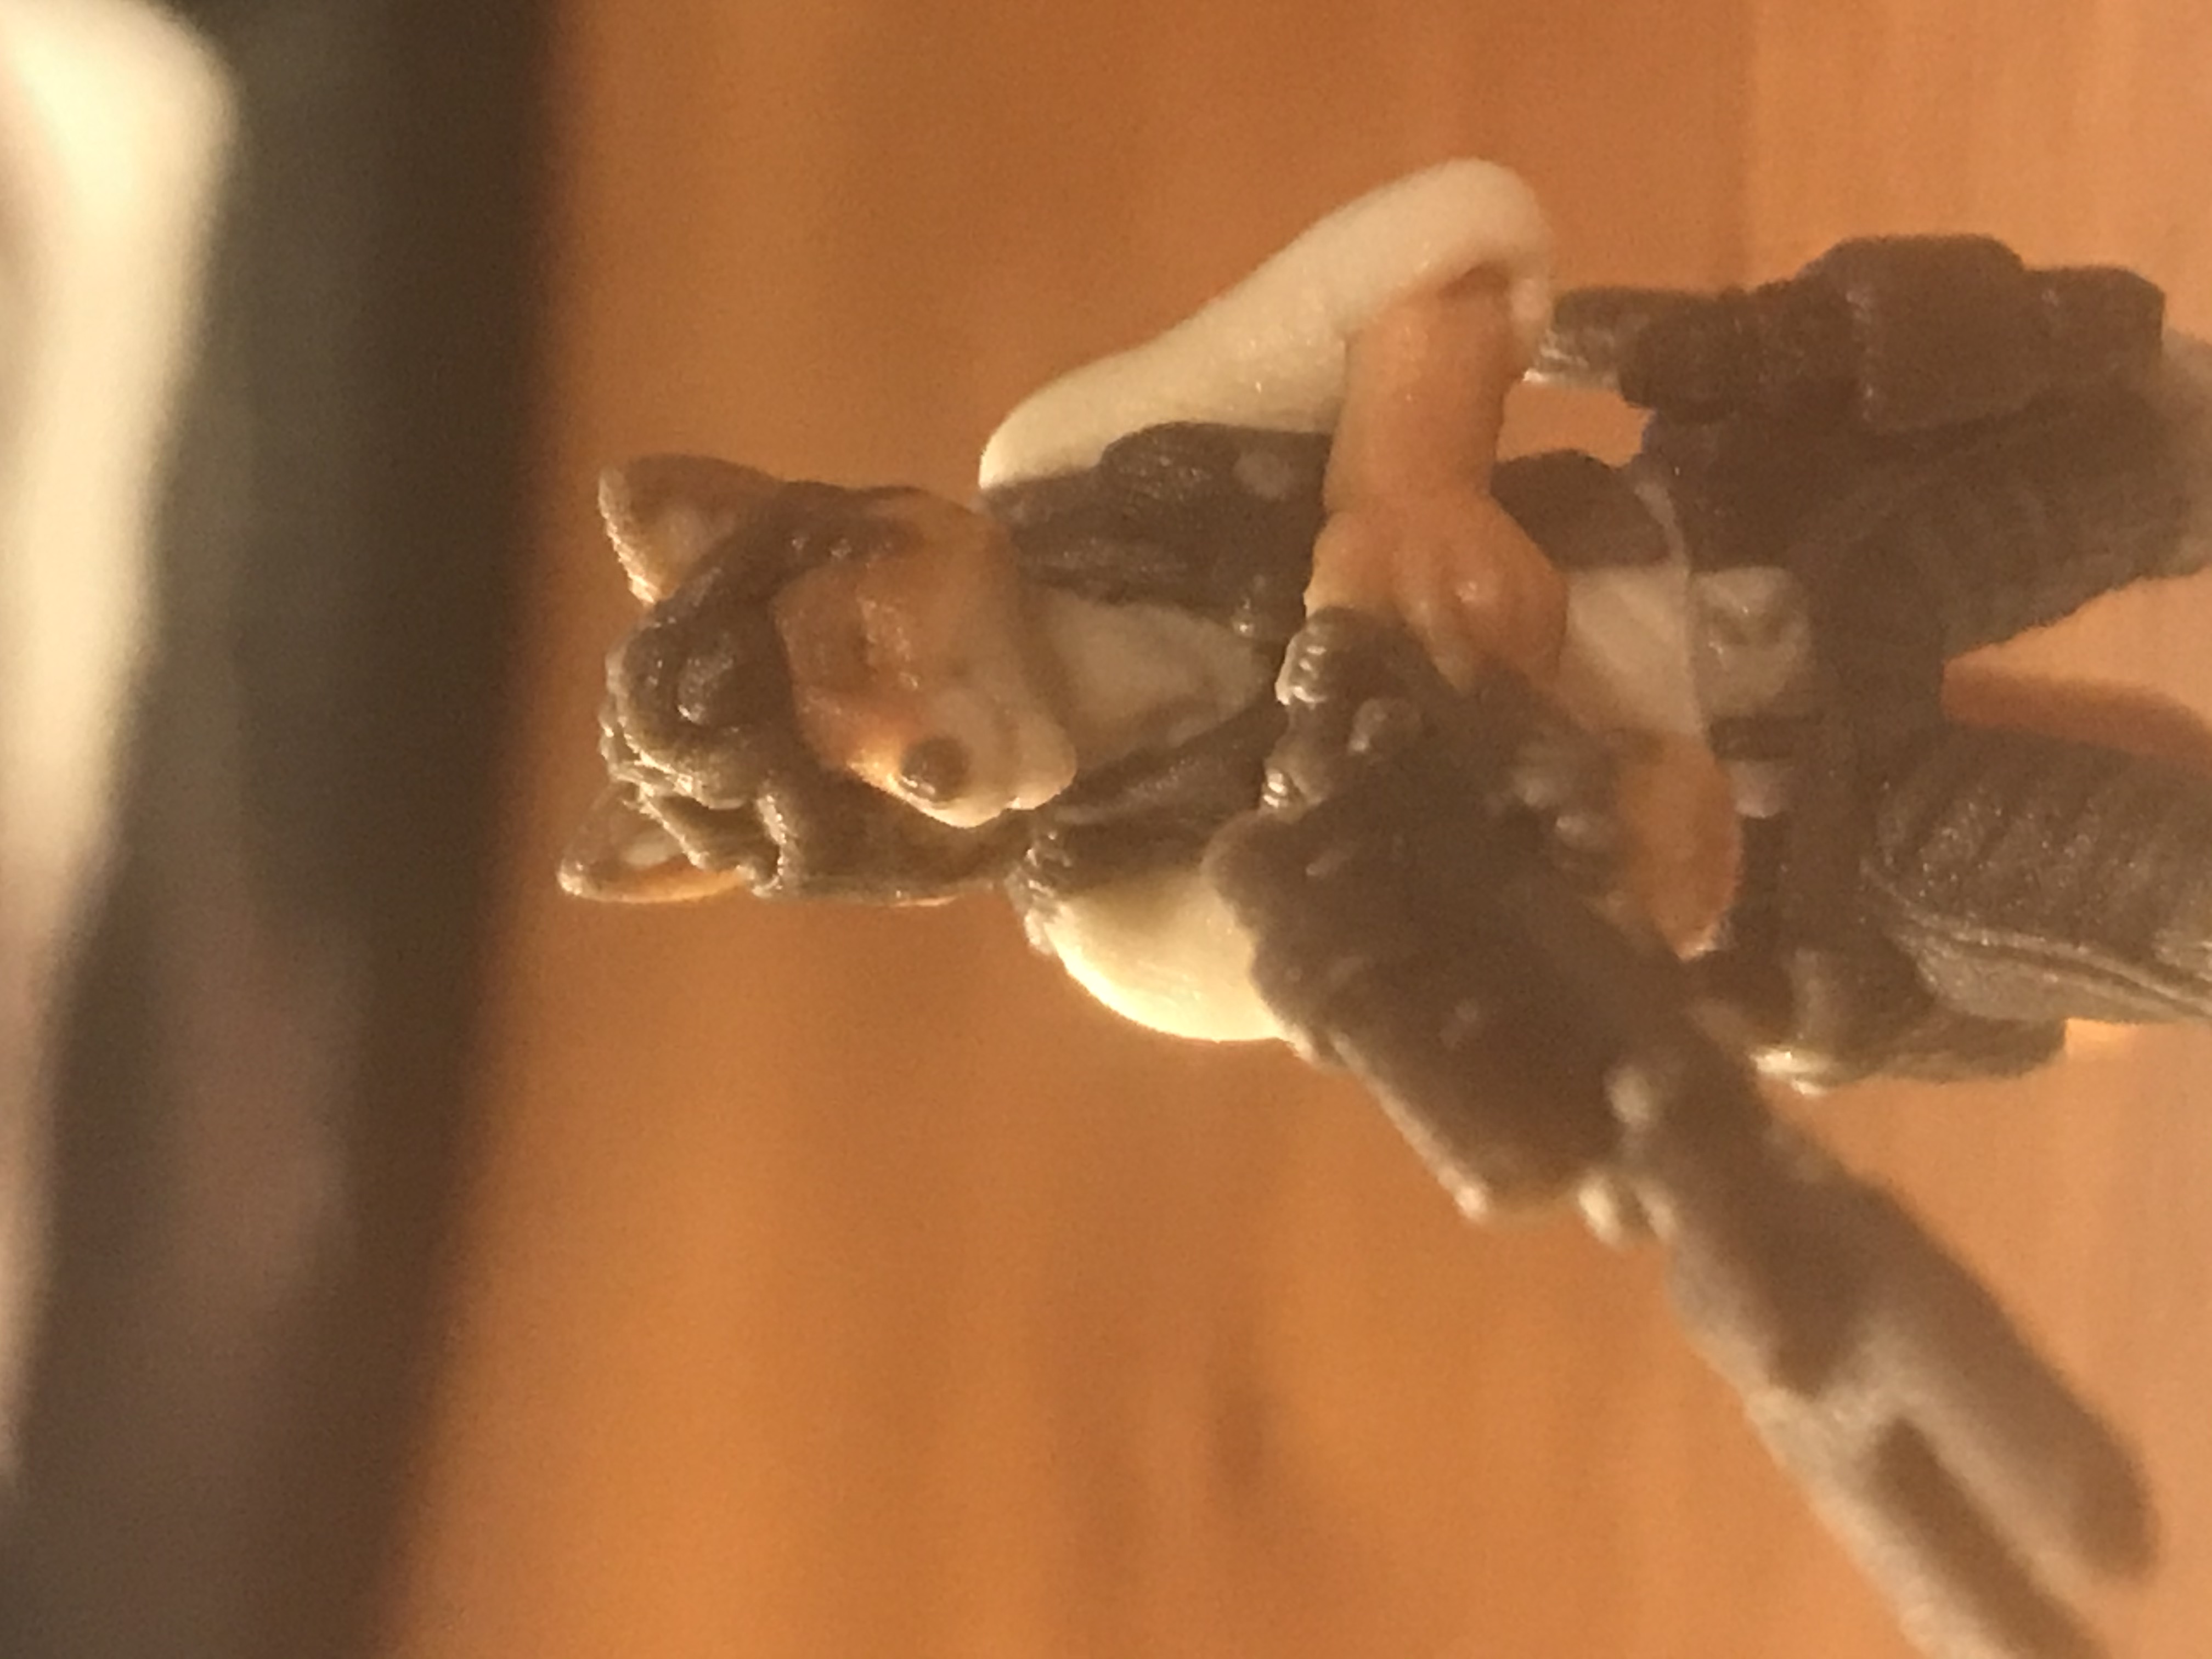
- Close-Up
Some overall thoughts, a lot of the unique color choices I programmed into the miniature don’t show up well. Especially metallic “sheen” and glowing effects; you can barely see the subtle yellow lights on the sniper rifle, and the metal on Hansune’s armor and the ground basically just looks gray in person. That being said, the precision on this is phenominal. I checked the whole miniature over, and nowhere does it look like one area’s color “bleeds” into the other. I’m 100% capable of slapping on some metallic paint, maybe a color wash, but I will tell you this readers—I could NEVER be this precise with my paint brush. I simply lack the skill. Honestly, this miniature’s coloring looks a lot better than many of the prepainted miniatures I’ve got in blisters from Wizkids and the like. Am I said the eyes have no color? Sure, but I couldn’t paint good-looking eyes anyway. This far exceeded my expectations, and if you’re like me and you want a quality, colored miniature but lack the time or skill (or both) to get that on your own, HeroForge color is AMAZING, especially considering the cost to use color plastic is just $15 more. Sure, that’s a 50% increase in price, but $15? Getting someone to paint your mini costs a TON more normally.
Prepainted Premium Plastic (149.99 USD)
This option isn’t up for Preorder or Betatesting yet, but based on how HeroForge has described the service, it sounds like you’ll design your miniature and your color palette, they’ll print the miniature for you using their standard plastic options, and then they’ll hand the miniature and your color palette to an artist to paint for you. So that’s where all this money is going—assuming you get a premium plastic miniature, this is an extra $110 USD on top of that. And honestly? That is an EXTREMELY fair price. I wrote an article on my experiences getting a miniature custom-designed and painted years ago, and that process—custom modeling and custom painting, probably cost me about $500 USD; $300 or so to get the mini made, and another $200 to have it printed and painted. So this? This is VERY affordable if the quality is high. Similar to the Bronze models, you’re not going to want to do this unless you’re sure your character has some longevity I think, and honestly I think that HeroForge should offer this service with their bronze material too so you can make sure that you get your custom-painted miniature in a high-durability material if you want it; probably looking at roughly $300 for that, which is STILL cheaper then my experience (and in a much stronger material). So I think this is a good deal if it’s something you want.
Token Maker
The last service I’m going to show you in this article is the new Token Maker! Basically, you can use HeroForge to take special screen shots of your miniature, then outfit that miniature with a number of unique borders to make a token similar to what you’d use on Roll 20 or other virtual tabletops.
-
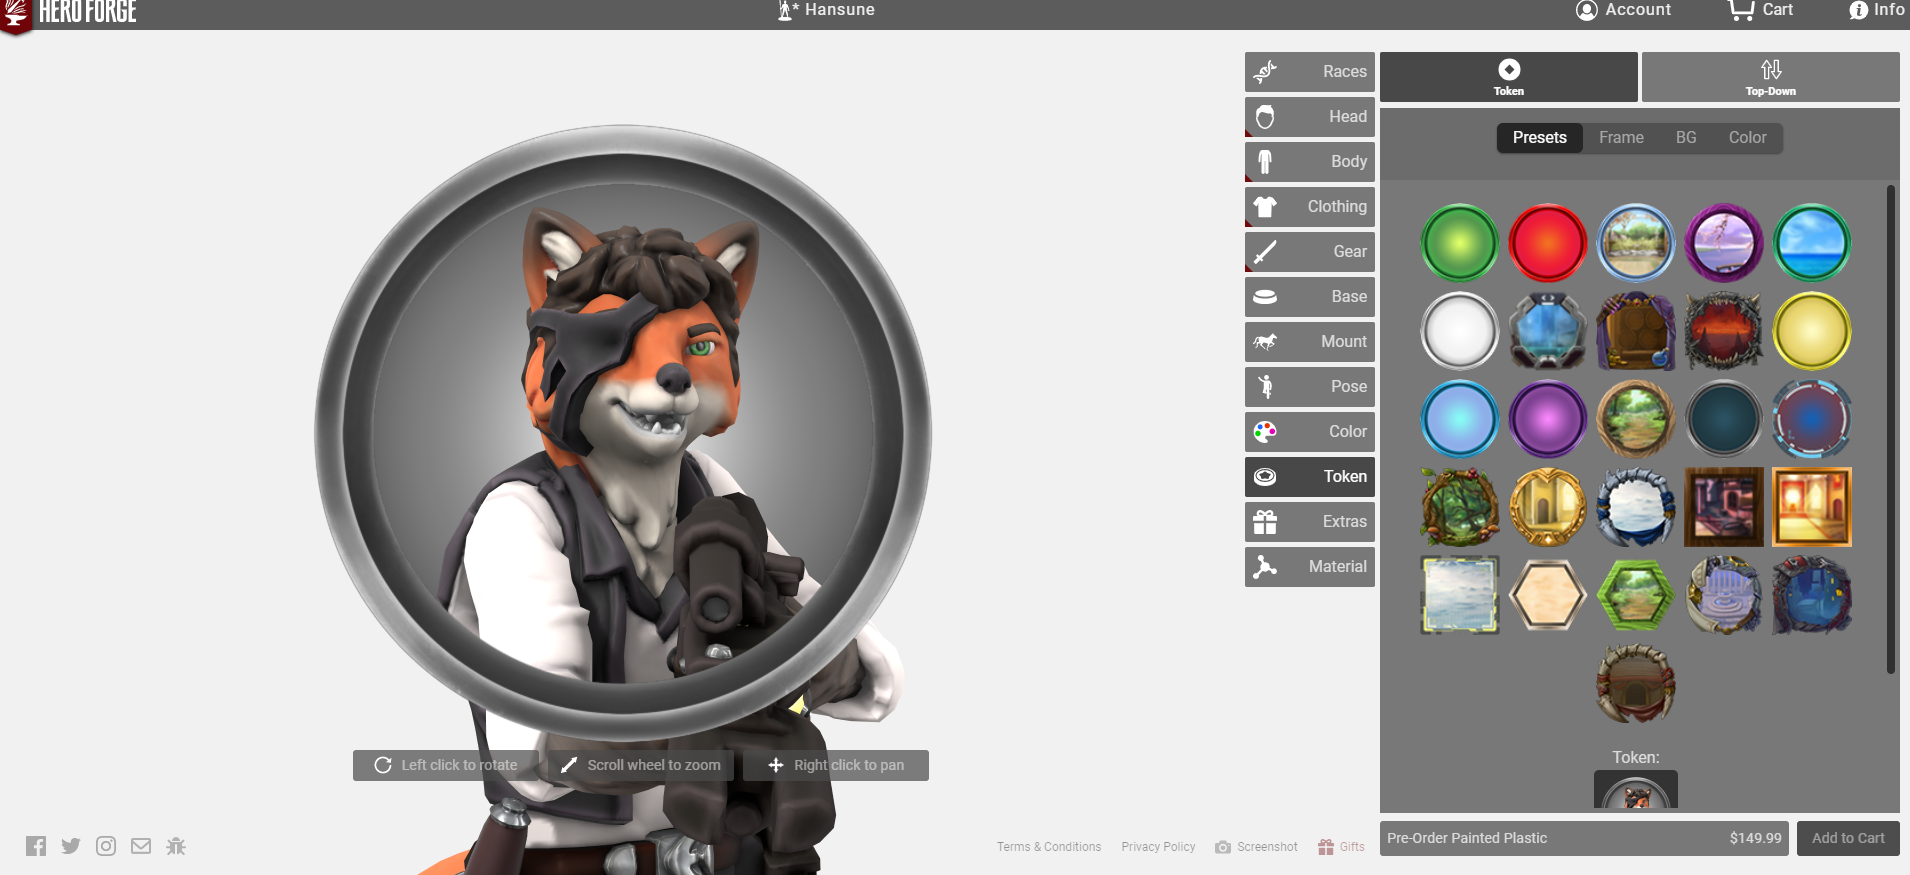
- When you go into Token Master, it starts by giving you a number of presets. You can use these if you want, or you can customize them to your heart’s content. Obviously, you know what I’m going to be doing by now.
-
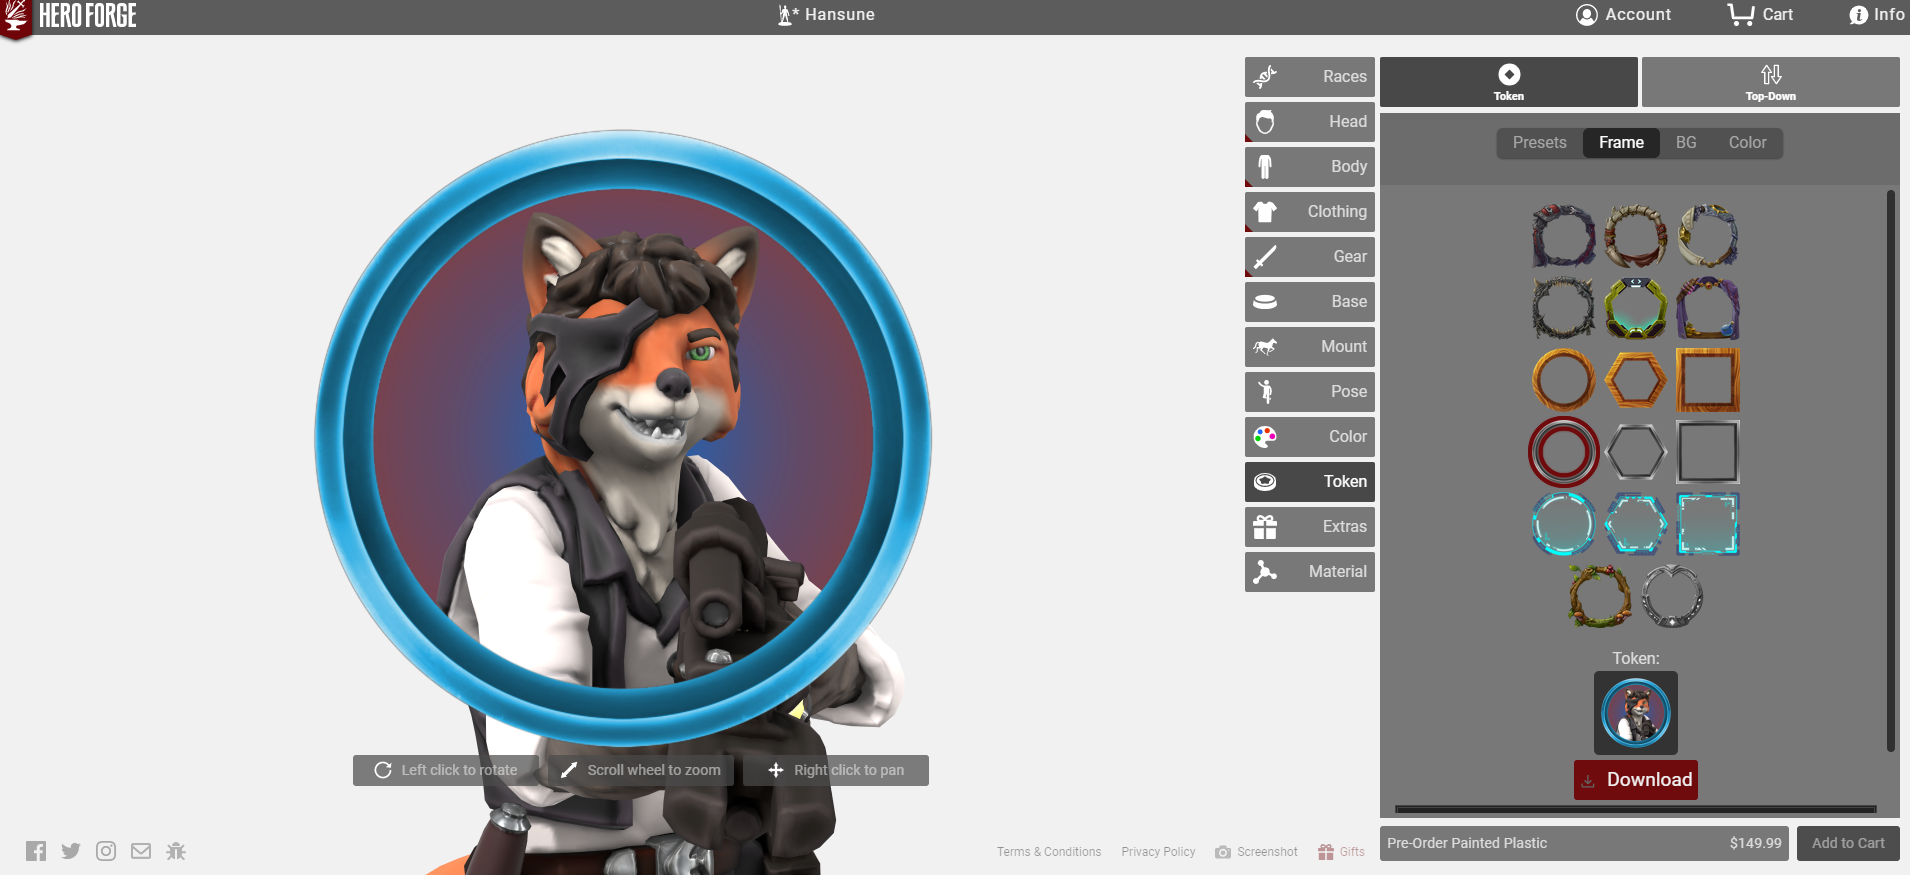
- The first option is the frame. There are a ton of awesome frames to pick from. I like this simple, metal ring, so I’m going to use it.
-
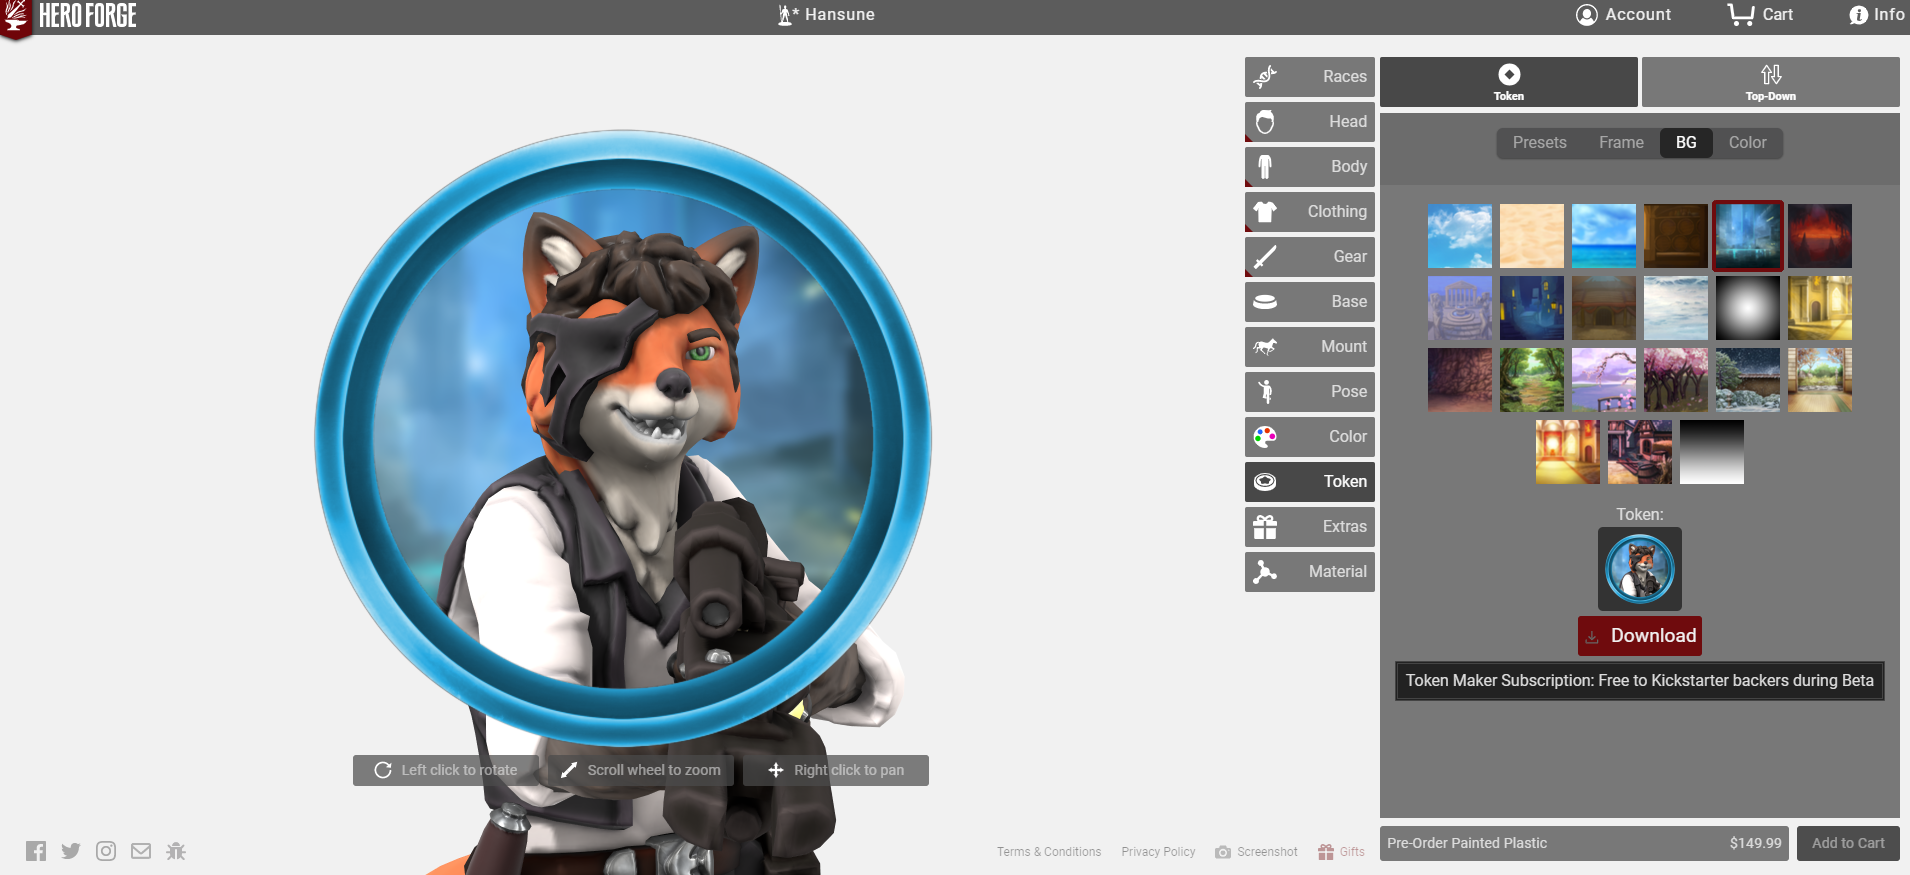
- Once I’ve picked my frame, I get to choose my background. You can just choose a color if you want to, but many of them are nice 3D artworks. The one I picked is of a futuristic city. Very appropriate for Hansune!
-
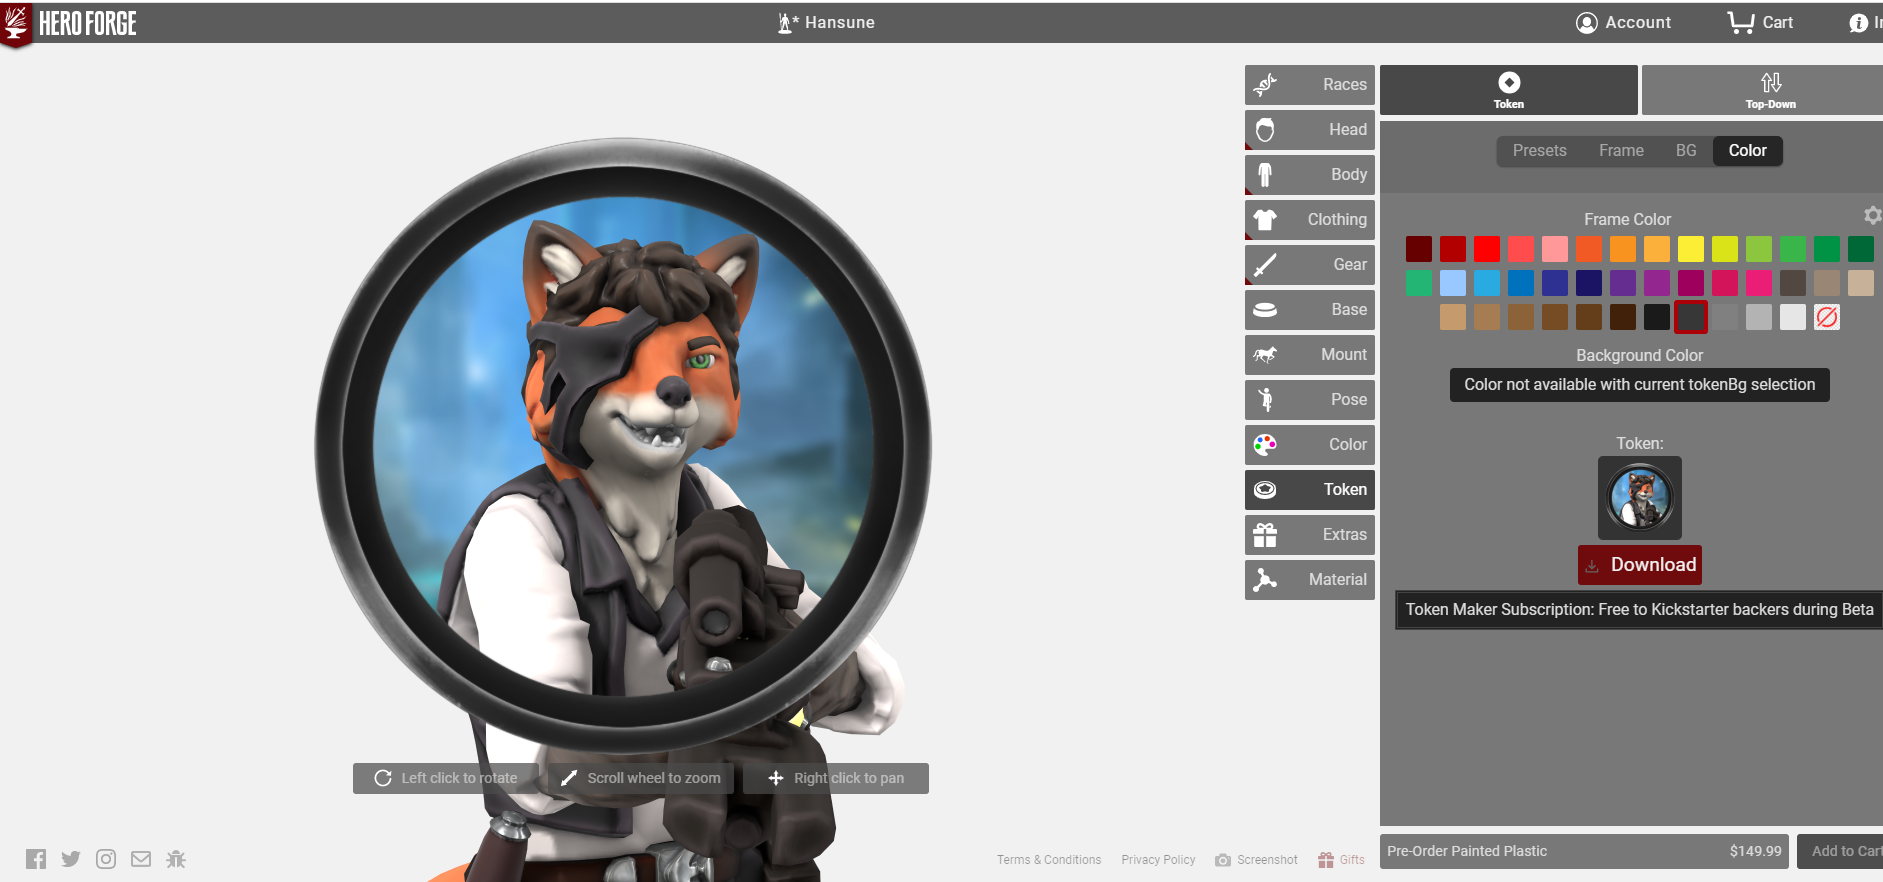
- Finally, you get to choose the color of your frame. I decided on black.
-
- When you’re done, non-subscription members will have to purchase the token. In addition to this round front-facing style, there’s a Top-Down option that’s not implemented yet that will likely be designed to look like a birds’ eye view of your character on its base.
So, is this tool worth it? Not sure yet, to be honest. Currently Token Maker is free for all HeroForge Color backers to use, but at some point it will become a paid service to everyone who didn’t purchase the Lifetime Color Token subscription reward. (Both Luis Loza and I purchased this; HOW COULD YOU NOT UNLIMITED TOKENS!) Based on the Kickstarter, a 1-year unlimited access to the Token Maker was valued at $39.99 USD, while Lifetime Access was valued at $149.99 USD. So I imagine that the Token Maker will cost SOMETHING to use, but hopefully the price point is kept low enough that people actually justify using the service. Personally, I think somewhere in the ballpark of $2 to $5 is probably fair, but we’ll have to wait and see.
In Conclusion,
It’s a regular occurrence for new Tabletop RPG products to be released and for people in the community to tout them as an “industry game changer.” Most of the time, I feel that this is just a way for someone who’s in the know about the industry to comment on their excitement for a project—especially one that completely defied their expectations. In my limited experience with the industry, however, HeroForge Color is *the* Game Changer that no one in the industry seems to really be acknowledging yet. Yes, normally things that people say will “change the industry” are business practices based, they’re ways for Tabletop RPGs to make money. But if those same industries aren’t careful, HeroForge Color might just be how industries *lose* money. Especially prepainted miniatures, because sweet Daikitsu this service is incredibly good. The ability for players to custom-design their perfect characters across a variety of IPs and settings is next to none, and has 3D printing technology improves and becomes more affordable, the value of this service will only increase. A world where a 3D printer is as common a household item as paper printer or a computer isn’t far off. We’ll see it in my lifetime. And when that happens, HeroForge stands poised to be at the top. Their service is phenomenal, their product, even in Beta, is of extremely high quality. And it will only increase in quality as time goes on. Personally, I’m of the opinion that companies like Paizo and Wizards of the Coast should be investing in HeroForge as the industry leader of the future that it will no doubt end up becoming. See if you can’t get them to work with you, get your partnerships in with them now before they blow up. Ride that wave to success. But then again, maybe I’m just dreaming of a day when I’ll be able to make myself a skittermander miniature in HeroForge!
Until next time, I’m Alexander Augunas and I’m signing out!