Hello, Randal here. I normally write Groundbreaking and Terraforming, but today I wanted to talk to you all about something very different, gaming tables.
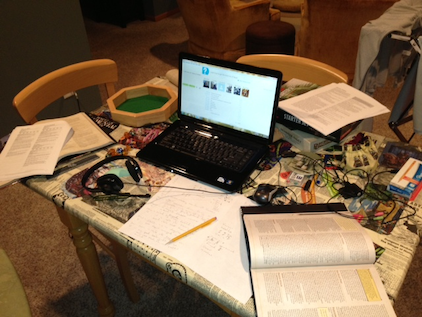
Every gaming group I have been apart of, regardless of the number of players, has had one issue in common – not enough room at the table. As a GM, I always take up more space than the players and so I have resorted to many different tactics to combat this. My favorite is to use a TV tray off to the side, which evolved into two trays when I started keeping a laptop handy. When game night was moved into the garage we began using a simple 6 foot folding table that made it harder to find space. I got my hands on a sturdy little shop desk on wheels that became my GM “desk”, but I still used TV trays and the guys started to as well so that the smaller table could be more focused on game materials (maps, minis, dice, etc.). Once we hit 100% laptop usage in my group, power cords and strips started to become another issue that we had to deal with daily. Setup and teardown became even more cumbersome than it already was.
With all of that backstory in mind, I began looking at all the fancy tables and table toppers at every Con I can attend (which isn’t many) as well as occasionally just googling to see what is currently on the market. I have no personal experience using any of them, but you can see many options by googling “board game table” or “board game table topper”. You will find a wide variety of options and quality that range from a couple hundred dollars to a couple thousand dollars. I can’t currently justify the thousands of dollars it would cost to have the table of my dreams, but I have almost as hard a time buying a bare bones version for only a couple hundred that doesn’t look like it has more options than if I were to simply slap something together myself.
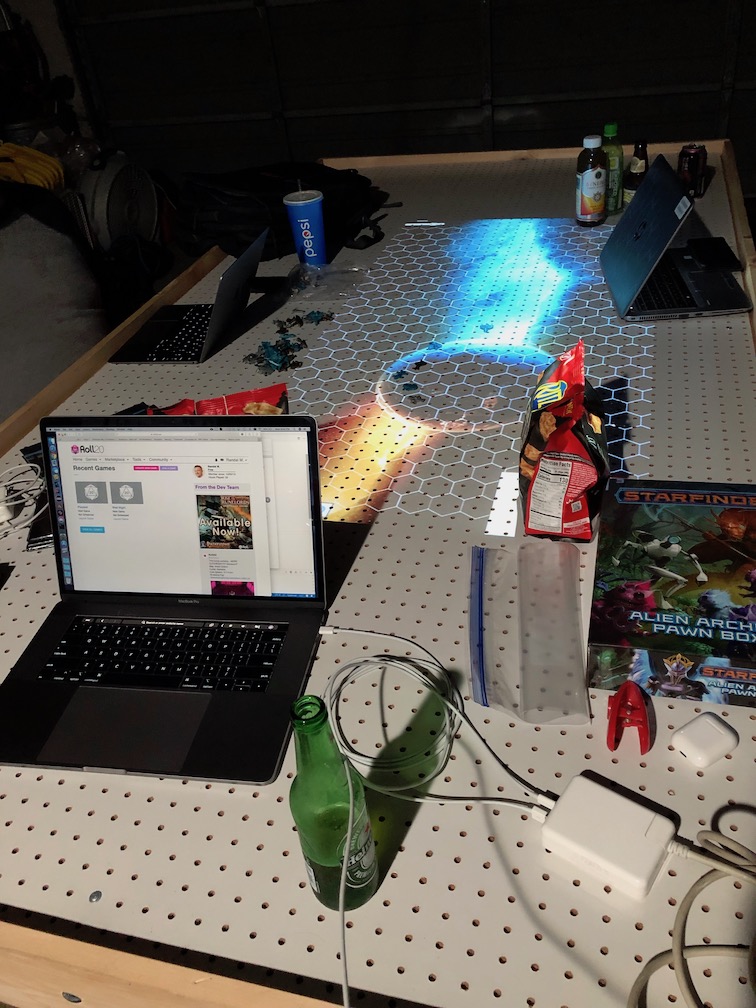
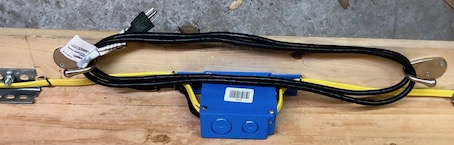
Well, as it turns out, I come from a background of carpenters and handymen, and so one day at lunch during a really bad day at work, I decided that I needed to take my mind off of things and went down the street to home depot. It was game day, I wanted to have a big and solid game table for game night, and I wasn’t concerned at all about finish or color or anything fancy. A standard sheet of plywood is 8 ft x 4 ft, so I bought a number of 8 ft long 2×4 (2 inches by 4 inches) studs to use as a frame to hold and support the plywood. While trying to work out in my head how to do the legs, I found myself standing by some premade saw horses that were cheaper than the wood it would cost me to build them myself, so I bought a pair of them instead (especially since I would need to stand this against a wall every night, the saw horses are easy to stack aside as well). While leaving the lumber section, I happened to see that they had a piece of peg board that was also 4 ft x 8 ft, and that the peg holes were a 1 inch grid … serendipity! I decided at the last minute, that if I was going to do this, I wanted to provide power for the laptops, so I hit the electrical department and bought what I needed to install 4 receptacles (one for each side of the table). I then went home and proceeded to build a table in the 4 hours I had left to kill.
Gaming Table Mark I
The first thing I did, was to cut my 2×4 studs to length, and screwed them together to build my frame. Then, I placed more lengths of 2×4 inside this frame to support the edges of the plywood, along with two cross supports. I then screwed everything together. I used a bunch of screws. It was not going to come apart. Next, I simply placed the plywood in the frame, and screwed it down all around the edges. This table was extremely sturdy, but was not easy to move, even for two of us large men. If you have a space where you can leave the table setup all the time, then this is a wonderfully cheap table. If, however, like me, you get tired of needing friends to move it around your garage every game night … and also when you need to get stuff from the wall behind it … you are going to want a lighter solution.
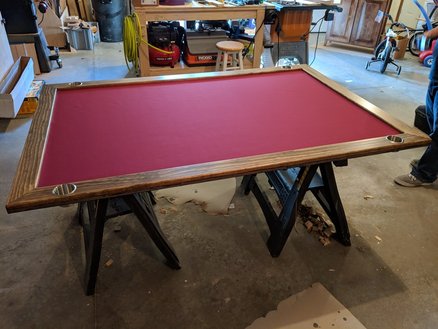
Gaming Table Mark II
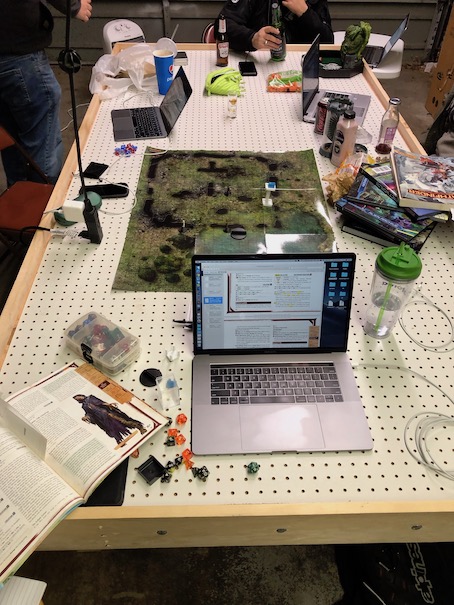
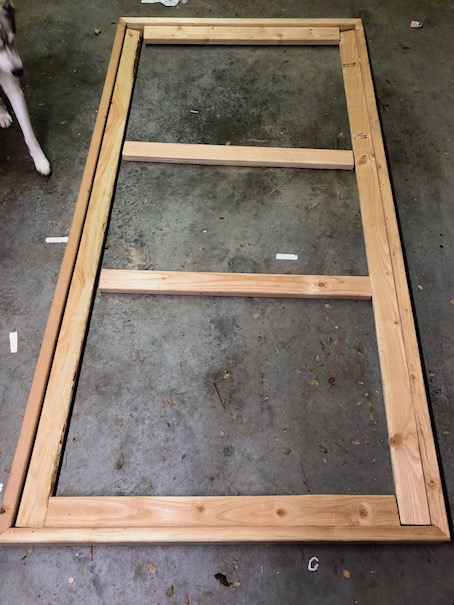
This time, I took a more serious attempt at a lightweight design. While simply slapping wood together is easy for anybody, it is not always ideal. To accomplish this, I chose to use a thinner frame (1×6 instead of 2×4) and I chose to support the plywood’s length with metal brackets. I still found that there was give in the corners, and so I did use some short 2×4 pieces to shore up the corners of the table because they had the added benefit of giving me somewhere to mount my receptacles. While it may seen like a strange place at first glance, I assure you that you want your power to be away from your legs to avoid hitting your cords with your knees every time you stand up or sit down.
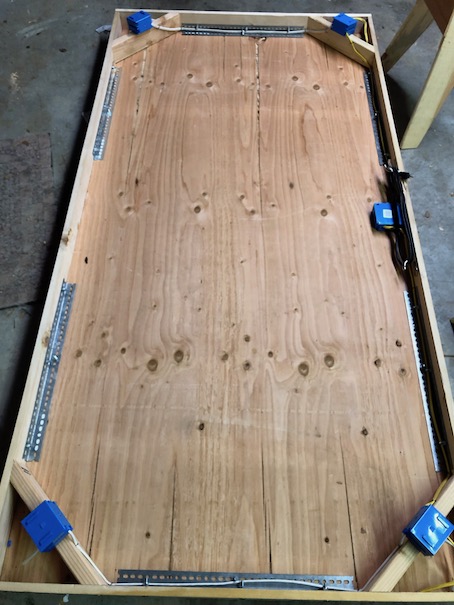
This version of the table is not only cheaper to build (less materials), and lighter (i think half the weight or better), it also has conveniently positioned power for all of your device powering needs. Do you remember that I mentioned I bought 1 in. grid pegboard? Yeah, it is a great addition to the top of the table to both hide the bare plywood, make it look a little more table like, but also to help for impromptu mapping using just dungeon tile accessories without a map underneath.

Summary of Cost and Effort
I was able to buy all the materials I needed for right around $175 dollars. When I built Mk II, I simply took Mk I apart and reused all the materials that I needed from it, with the exception of buying those brackets that cost like $10 each (with bolts). If I were to buy everything I needed to rebuild Mk II from scratch, I think the cost would be around $175 or possibly less. But, let’s be honest, I already know what I would do different with Mk III. If you wanted less (or no electrical) then you can save money there. If you have an old table you can set this on, than you can save money by not buying the saw horses as well. The peg board was cheap (in my opinion) but leaving it out can also cut costs.
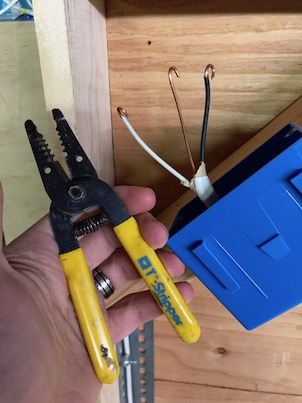 I have the saws handy to let me do my own cutting at home, but if you go to a big box store like Home Depot, you can ask them to make simple cuts for you. I also have my own screw/drill gun set, so that is something else that you will need to pay attention to. If you don’t have one or can’t borrow one, you can always use nails instead, but it will be more effort and has a lot more room for error (and screws simply hold better than nails). The electrical work is actually a lot easier than most people think it is. You will need a pair of wire cutters/strippers to do the work, though. I did use a hammer to staple down the wires. Note
I would be more than happy to discuss how I built the tables, what choices I made, and how I would change a Mk III on our Discord server https://discord.gg/Rt79BAj. If there is enough interest, I would be happy to put together a more in depth view of the materials, costs, and steps it took me to work on each table.
One Last Thing …
Because I game in my garage, a friend of mine brought over an old projector that he had lying around and we hung it in the rafters of my garage over the table … although now I need to get a solid piece of white wood to better reflect the light and also hide the grid beneath …