Welcome to Craft Wondrous Item, where the Know Direction Crew show you all of the neat things that they’ve been crafting! Today, Private Sanctuary Podcast’s cohost, Guidance’s author, and self-stylized Everyman Gamer Alex Augunas is going to be showing you the process by which Philly Venture-Agent Tim Stapleton makes custom spellbooks!
Continuing with last article’s theme, I’ve wrangled another Pathfinder Player and crafter into showing off his wondrous creations. This time, I’ve got my fellow Philly Venture-Officer Tim Stapleton to craft a home-made spellbook for my kitsune sorcerer, Yujin!
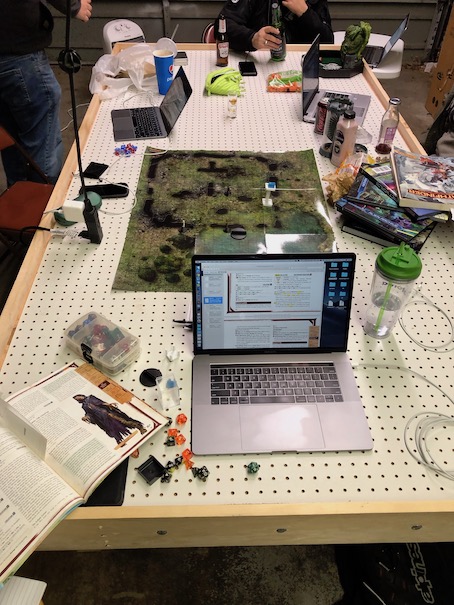
When I expressed interest in Tim’s craft to him, the first thing he did was ask me what class and class options my character had. I ended up opting for Yujin over Khar (my cleric) because Yujin is lower-level than Khar, which means I’d have more time to use and appreciate the spellbook. Tim took that choice into account when he picked the paper and bindings for Yujin’s spellbook, which you’re going to see below. (All of the pictures show the process that Tim went through in creating Yujin’s spellbook.) Also, Tim tells me that he’d totally consider taking commissions for these if anyone was interested in having a custom spellbook made; you can contact him at tim.stapleton7@gmail.com if you’d like to inquire about getting your own spellbook. (And yes, that’s right. If I like your craft and I want you to make me one of my very own, I will pay you for it. Just another reason you should send me messages about appearing on Craft Wondrous Item!)
Without any further delay, here’s Tim on his construction of his fantastic Stapleton Spellbooks!
Tim’s Guide
- This is a how-to for making a Coptic stitch spellbook. The Coptic stitch is a method of bookbinding that developed in Egypt in the Second Century C.E. It makes a beautiful binding that allows the book to lay flat when opened, and is very durable. The perfect thing for a spellcaster on the go!
- Book Binding Supplies:
- Book board (or other stiff cardboard)
- Book cloth
- Decorative Paper
- Bone fold
- Needle and thread
- Awl
- 32 sheets of printer paper
- Crafting glue
- Glue brush
- Tea bags or coffee grounds (optional)
- Razors or Exact-o knives
- Self-healing cutting mat
- Ruler
- Rags or paper towels
- The pages
- Count out how many spells your PC will know during her career. For example, a 20th level sorcerer will know 6 first-level spells (including the bloodline spell), 6 second-level spells, and so on. This totals 43 spells (not counting cantrips). When you add in title pages for each spell level, you’ll need 52 pages. Coptic stitch bindings work really well when you have 8 sections of 8 pages each, so you’ll have some extra room in the book. I like to add the bloodline powers (6 pages, including a title), and a section at the end for magic items that your PC will use frequently.
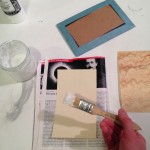
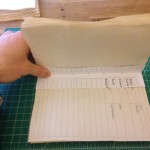
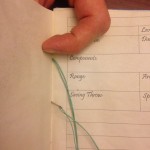
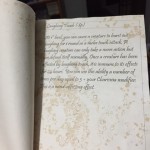
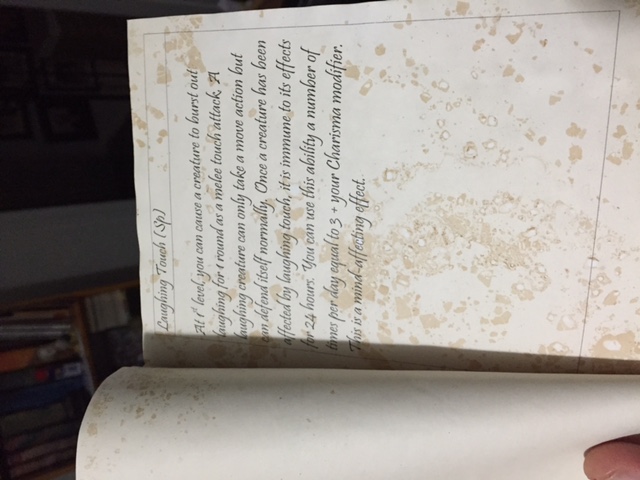
- Create a spell template in Word similar to what I’ve done, that captures all of the spell’s info and leaves room for a verbatim description. Print them out so that the template sits in the right half of the page, on both sides. This way, when you fold the sheet in half, the templates are both facing forward.
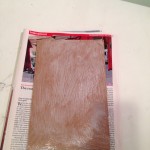
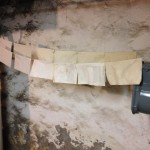
- If you want the pages of your spellbook to have the look of aged parchment, soak them in a vat of tea or coffee. (I save used tea bags and coffee grounds.) Each page should soak for at least 4 hours. Be careful handling them when they’re wet or they’ll rip.
- When they’re dry, fold them over so that the corners match up as close to perfectly as possible. Because the paper will have wrinkled, they won’t match exactly. Use the bone fold to make the crease sharp and clean.
- Organize the pages into 8 sections of four sheets each. Be very careful to make sure that they are arranged in the correct order. When you leaf through the book, there should be 6 pages with blank spell templates following the first level spell cover page, then the second level spell cover page, then 6 blank spell templates, etc.
- Press the folded pages to smooth out excess wrinkles. I leave mine in between the hardcovers in my stack of rulebooks overnight.
- The cover
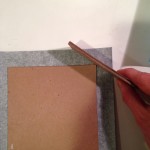
- Take a single page of your spellbook after its been folded and trace its outline onto your book board. Be mindful that the grain on the book board should run from top to bottom, not side to side. This will minimize how much it will bend as it ages. Do the same for the second piece.
- Put the book board onto your cloth and measure it out, adding an extra inch in all directions. Cut it with your razor. Keep a self-healing mat underneath all your cuts to protect your table top.
- Brush your glue onto the book board and place it on the cloth, so that there is an equal amount of cloth extending around it on all sides. You’ll want to keep scrap paper underneath everything that you brush with glue, to keep it from getting all over everything.
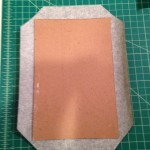
- Cut the corners off of the book cloth so that it forms an oddly proportioned octagon. Don’t cut the cloth too close to the corners of the book board, or the board will show through in the final product—leave a margin equal to twice the thickness of your book board. I’ve glued together two pieces of scrap to serve as a guide.
- Spread glue on each flap and smooth it down, using your bone fold to make sure the cloth wraps it tightly and there are no lumps of glue. Some glue will probably ooze out around the edges. Use a rag to wipe it up.
- Repeat this process on all sides, being careful to tuck in the extra bit of cloth that forms at the corners.
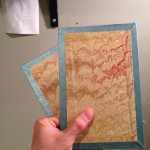
- Cut your decorative paper to cover the bare cardboard on the inside of the cover. It should be about a half-inch short of the edge in all directions. Then, glue it down, again using your bone fold to smooth it down and squeeze out any excess glue.
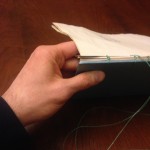
- Sewing
- Take a piece of scrap paper the same height as you pages and punch 5 holes in it. Start in the very center, then punch holes 1/2 inch down from the top and 1/2 inch up from the bottom. Punch holes roughly halfway between the topmost hole and the center, and then again halfway between the bottommost hole and the center. This scrap is called a jig and it will help you punch holes in your pages and covers so that they all line up.
- Place the jig inside each section and punch a hole with a needle or an awl.
- Place the jig on top of your covers, about 1 inch away from the edge, and make a mark with your pencil. Use your awl to punch holes through the cardboard. Do not do this on top of your mat or on your workstation. Put the covers on top of some scrap wood or other surface that you don’t care about damaging. All that is left now is to sew.
- Count out a length of thread equal to the height of your book times 10 (twice the number of sewing stations).
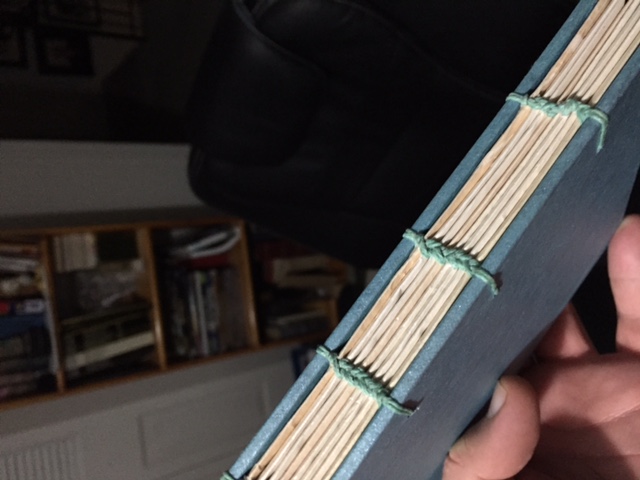
- The Coptic stitch is a bit tricky. It will take some practice to get it right, especially if you are new to bookbinding. There some great tutorials online. I recommend this one: https://www.youtube.com/watch?v=ue52htX3j0k
- Questions?
- That’s it! Making these books takes time and patience, but it’s well worth it. You’ll have a cool spell book that will last the life of your character and be the envy of the other casters in your lodge.
- If you have any questions or you’d like to commission a book, feel free to contact me at customspellbooks@gmail.com
-
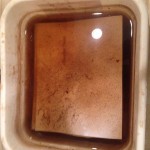
- Antiquing the pages of the spellbook.
-
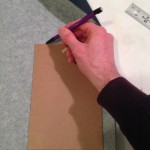
- Measure twice, cut once.
-
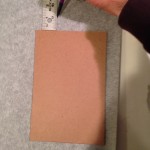
- Measuring twice … again. Cutting once … again.
-
- Alchemical glue is best glue for making gorgeous spellbook covers.
-
- This is the one time that you actually WANT to cut corners.
-
- Its like some wonderful arcane stop sign.
-
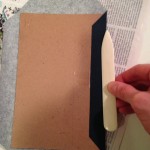
- Smoothing the glue is vital; no one wants creases in their spellbook, right?
-

- Tuck and roll! (Wait, no! Don’t roll the book! DON’T ROLL THE BOOK YET!)
-

- Cover complete!
-
- Oh yeah, except for the gorgeous decorative interior.
-
- You’ve activated my trap card!
-
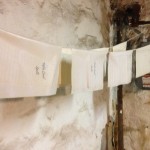
- We’re painting the pages plum! (Sort of.)
-
- And to think, you watched the Super Bowl when you could have watched SPELLBOOK PAGES DRY!
-
- Measuring is the number one most important skill that you need to make this project work.
-
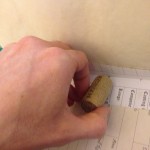
- Hole punching the medieval way!
-
- Stacks upon stacks of beautiful spellbook pages.
-
- Bobbing and weaving.
-
- More bobbing and more weaving.
-
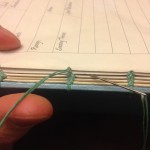
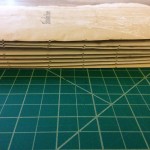
- The super cool knot that keeps it all together!
-
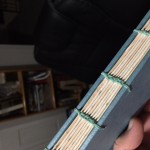
- Beautiful binding.
-
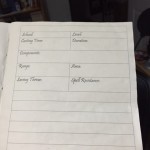
- The spell pages.
-
- My bloodline powers.


Very cool…would love to have something like this for pact magic spirits as well. Once Grimoire of Lost Souls is done, might have to experiment with formatting and see if I can make one…