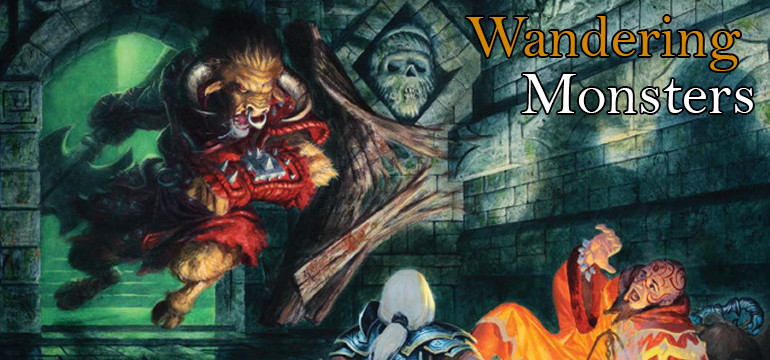
The monsters continue to wander this Fighting Friday! Following up from the last Wandering Monsters article, today I present the second half of the Forest Ruins. While the two can be used independently, using them together can create a large encounter area akin to a small dungeon. Without further ado, let’s dive deeper into the Forest Ruins!
Inside the Forest Ruins
The stairs descend into the ruins, barely lit by the light from outside. The dim light illuminates the base of the stairs which are flanked by a pair of statues. The grim expressions on the statues hints that they were sculpted with somber thoughts in mind.


Forest Ruins Features
Within the chambers of the ruins, ceiling height averages 10 feet. The walls are reinforced masonry, covered in moss and other plant growth. All of the statues are of stoic figures of some kind, related to the long lost ancient builders of this place. These may be images of ancient saints or legendary guardians. Unless otherwise noted, the ruins are not illuminated.
1. Platform
The entryway leads to a large, stone platform engraved in prayers and songs in an ancient language. The platform was once used as a place of meditation and prayer or perhaps for rituals. The engraved words hint at the platform’s use. If the rival adventurers are within the ruins, they have trapped the statues in the entryway. A thin rope is tied between the third pair of statues and anyone hapless visitors that trip the rope causes a statue to fall on them, creating a large amount of noise in the process.
FALLING STATUE TRAP CR 3
Type mechanical; Perception DC 20; Disable Device DC 20
EFFECTS
Trigger location; Reset manual
Effect Atk +15 melee (4d6); multiple targets (all targets in a 10-ft. line)
2. Altar
This large altar is that of an ancient or evil god. The altar has not seen any use unless the hidden cult is within the ruins. In this case, there is a sizable amount of dried blood and a bloodied masterwork dagger upon the altar.
3. Tomb
A number of stone coffins fill this room. Each of the coffins is empty, save for the bones of its inhabitants, raided years ago. A dirty, but otherwise intact silver ring worth 100 gp is at the bottom of one of the coffins, missed by raiders over the years. Finding the ring requires a successful DC 18 Perception check.
4. Camp
This room was once a residence for the denizens of the ruins. Today, the walls of this room have collapsed, destroyed by the growth of nearby trees on the surface. The exposure to the outside air has long rotted and destroyed the cots once housed here. An opening allows access to the surface, but the space is rather small, requiring a Medium creature to squeeze to move through. The opening is visible from the surface with a DC 25 Perception check. Bedrolls and a smoldering campfire are signs of recent occupants in this room.
5. Chapel
A small dais stands before a set of pews. The chapel was once used for weekly services in worship. It stands relatively intact today.
6. Fountain
This fountain was the centerpiece of meditation and rituals. The denizens of the ruins would circle the fountain while chanting. The fountain was imbued with magic, purifying any water within. The magic stopped functioning some time ago, but the water within is still blessed. The PCs can collect up to five vials of holy water from what remains within.
Encounters
The following encounters can take place here.
| Encounter | Challenge Rating | Creatures | Treasure |
| Goblin Hideout | CR 5 | Goblin CommandoMC, Goblin DogB1, Goblin OutriderMC, 3 Goblin WarriorsB1 | 28 gp, Elixir of fire breath, wand of fireball (6 charges) |
| Rival Adventurers | CR 6 | Border GuardNPC, Murderous HalflingNPC, Shoreline ClericNPC | 166 gp, bracers of armor +1, efficient quiver |
| Hidden Cult | CR 7 | Bramble SorcererNPC, Cruel DevoteeNPC, 2 InitiatiesNPC | 13 gp, lens of detection, scroll of commune |
This week’s Encounter Table makes use of Bestiary 1, Monster Codex, and NPC Codex.
Goblin Hideout (CR 5)
A small tribe of goblins call the ruins their home. The remaining leaders of the tribe are strewn about the ruins. The commando rests at the camp. The outrider and her mount patrol the main halls of the ruins, stopping at the platform every 5 minutes or so. The warriors hide among the coffins in the tomb, content to entertain themselves with a hiding game. During the night, there is a 60% chance that any of these goblins are asleep at the camp. Additionally, there are 8 goblin commoners that make up the remainder of the tribe scattered about in the various rooms of the ruins.
When the PCs approach, the outrider does its best to raise the alarm, prompting the commando and warriors to join the outrider in the defense of the tribe. If either the commando or outrider are slain, the remaining warriors do their best to gather the rest of the tribe and flee. The remaining leader will do its best to delay the PCs to allow the tribe to retreat. The goblins keep their treasure on the altar. The items belonged to the chieftain until an unfortunate accident with the wand led to her demise. They sit here unused ever since.
Rival Adventurers (CR 6)
A rival group of adventurer’s reach the ruins before the PCs, taking their time to explore and scour the ruins for any remaining possible treasure. The three adventurers are just about done with the exploration however, as it seems that the ruins have nothing to offer. The three are always found in the camp, discussing their next steps.
When the PCs approach, the three jump to defend themselves. If the PCs triggered the statue trap in the entryway, they begin to prepare with defensive spells, readying an ambush. In combat, the border guard and murderous halfling rush into combat, while the shoreline cleric attempts to offer support from the back lines. If one of the three falls, the remaining two either attempt to surrender or flee it seems that the PCs would be distracted with the final member. The cleric holds on to the party’s treasure with the intent to sell it in the next city.
Hidden Cult (CR 7)
This ancient temple is a holy site to the small cult of an evil god. The cultists within represent the remaining members of the splinter faction that came to investigate the ruins. The cultists intend to establish the ruins as a headquarters where they can grow the cause. At any given time, there is a 50% chance that the cultists are either in the chapel or the fountain room. The cultists are deeply fanatical and the visit to the ruins is marked with many sleepless nights of study and prayer. There is a 20% chance that a given cultist is fatigued. A fatigued cultist has a further 20% chance to be exhausted instead. However, due to their fanaticism, a fatigued or exhausted cultist gains the benefits of the Diehard feat as they are desperate to keep the ruins safe.
When the PCs arrive, the cultists rush to attack. The cruel devotee and initiates enter the fray. The initiates doing their best to flank with the devotee or prompt the PCs to use their attacks of opportunity on them. The devotee does his best to stun either a PC who appears to be a priest or spellcaster. The bramble sorcerer makes use of his wand of entagle on the grass growing within the ruins. The cultists fight to the death to defend the ruins. The sorcerer holds the cultists’ treasure, which includes a gem sacred to their cause and a scroll which is used to communicate with their god.
Combining Locations
The two parts of the Forest Ruins link up seamlessly with each other for an oversized encounter area. If you plan to use the two together, consider a few additional details to better link the two. Denizens outside of the ruins and inside of the ruins can work together to defend the site. For example, the goblins might retreat inside to gain aid from their allies within. Alternatively, the cultists could make their way outside to bolster the rest of their comrades, defending the ruins to the death. The PCs could even work their way through the ruins “backwards” by finding the entrance into the camp area and working their way out. In this case, the inhabitants might run outside and prepare an ambush for the PCs as they exit through the main staircase.
That’s it for this week! Please let me know your thoughts on linking the maps together. Would you be interested in seeing more of the maps link up or would unique maps be a better approach? If you have any request for a future Wandering Monsters, please drop me a line at KnowDirection@hotmail.com.


Hi Luis,
As someone who may try to run some of these, could you have some way for me to get the map for these “Wandering Monsters” segments without the numbers on it? Makes it much easier to put into a VTT. 🙂
Thanks!
Hey, David!
I totally hear you on the tagless maps. Going forward, I’ll best a copy of both the tagged and tagless maps. Additionally, I’ve updated the previous entries to show both maps. Hope this helps!
Much appreciated!